Create
Onboard Your Agentic App
This guide helps developers register their Agentic App on the Webex Developer Portal. Currently, only MCP (Model Context Protocol) servers are supported. A2A (Agent2Agent) support will be added soon.
anchorPrerequisites
anchorBefore starting, ensure you have:
- Access to the Webex Developer Portal.
- A deployed MCP server reachable via HTTPS.
- Authentication details for your app. We support the following authentication types:
OAuth2 authorization code– User-level OAuth flow where each user authenticates and grants access individuallyOAuth2 client credentials– Org-level OAuth flow using a single set of client credentials on behalf of the organizationAPI key– A single static key issued at the org level to identify and authorize requestsUser token– An individual token representing a specific user's identity and sessionCustom Header based Auth– Custom authentication headers that can be configured at org or user level
anchorStep-by-Step Registration Process
anchor1. Navigate to the Webex Developer Portal
Open https://developer.webex.com in your browser.
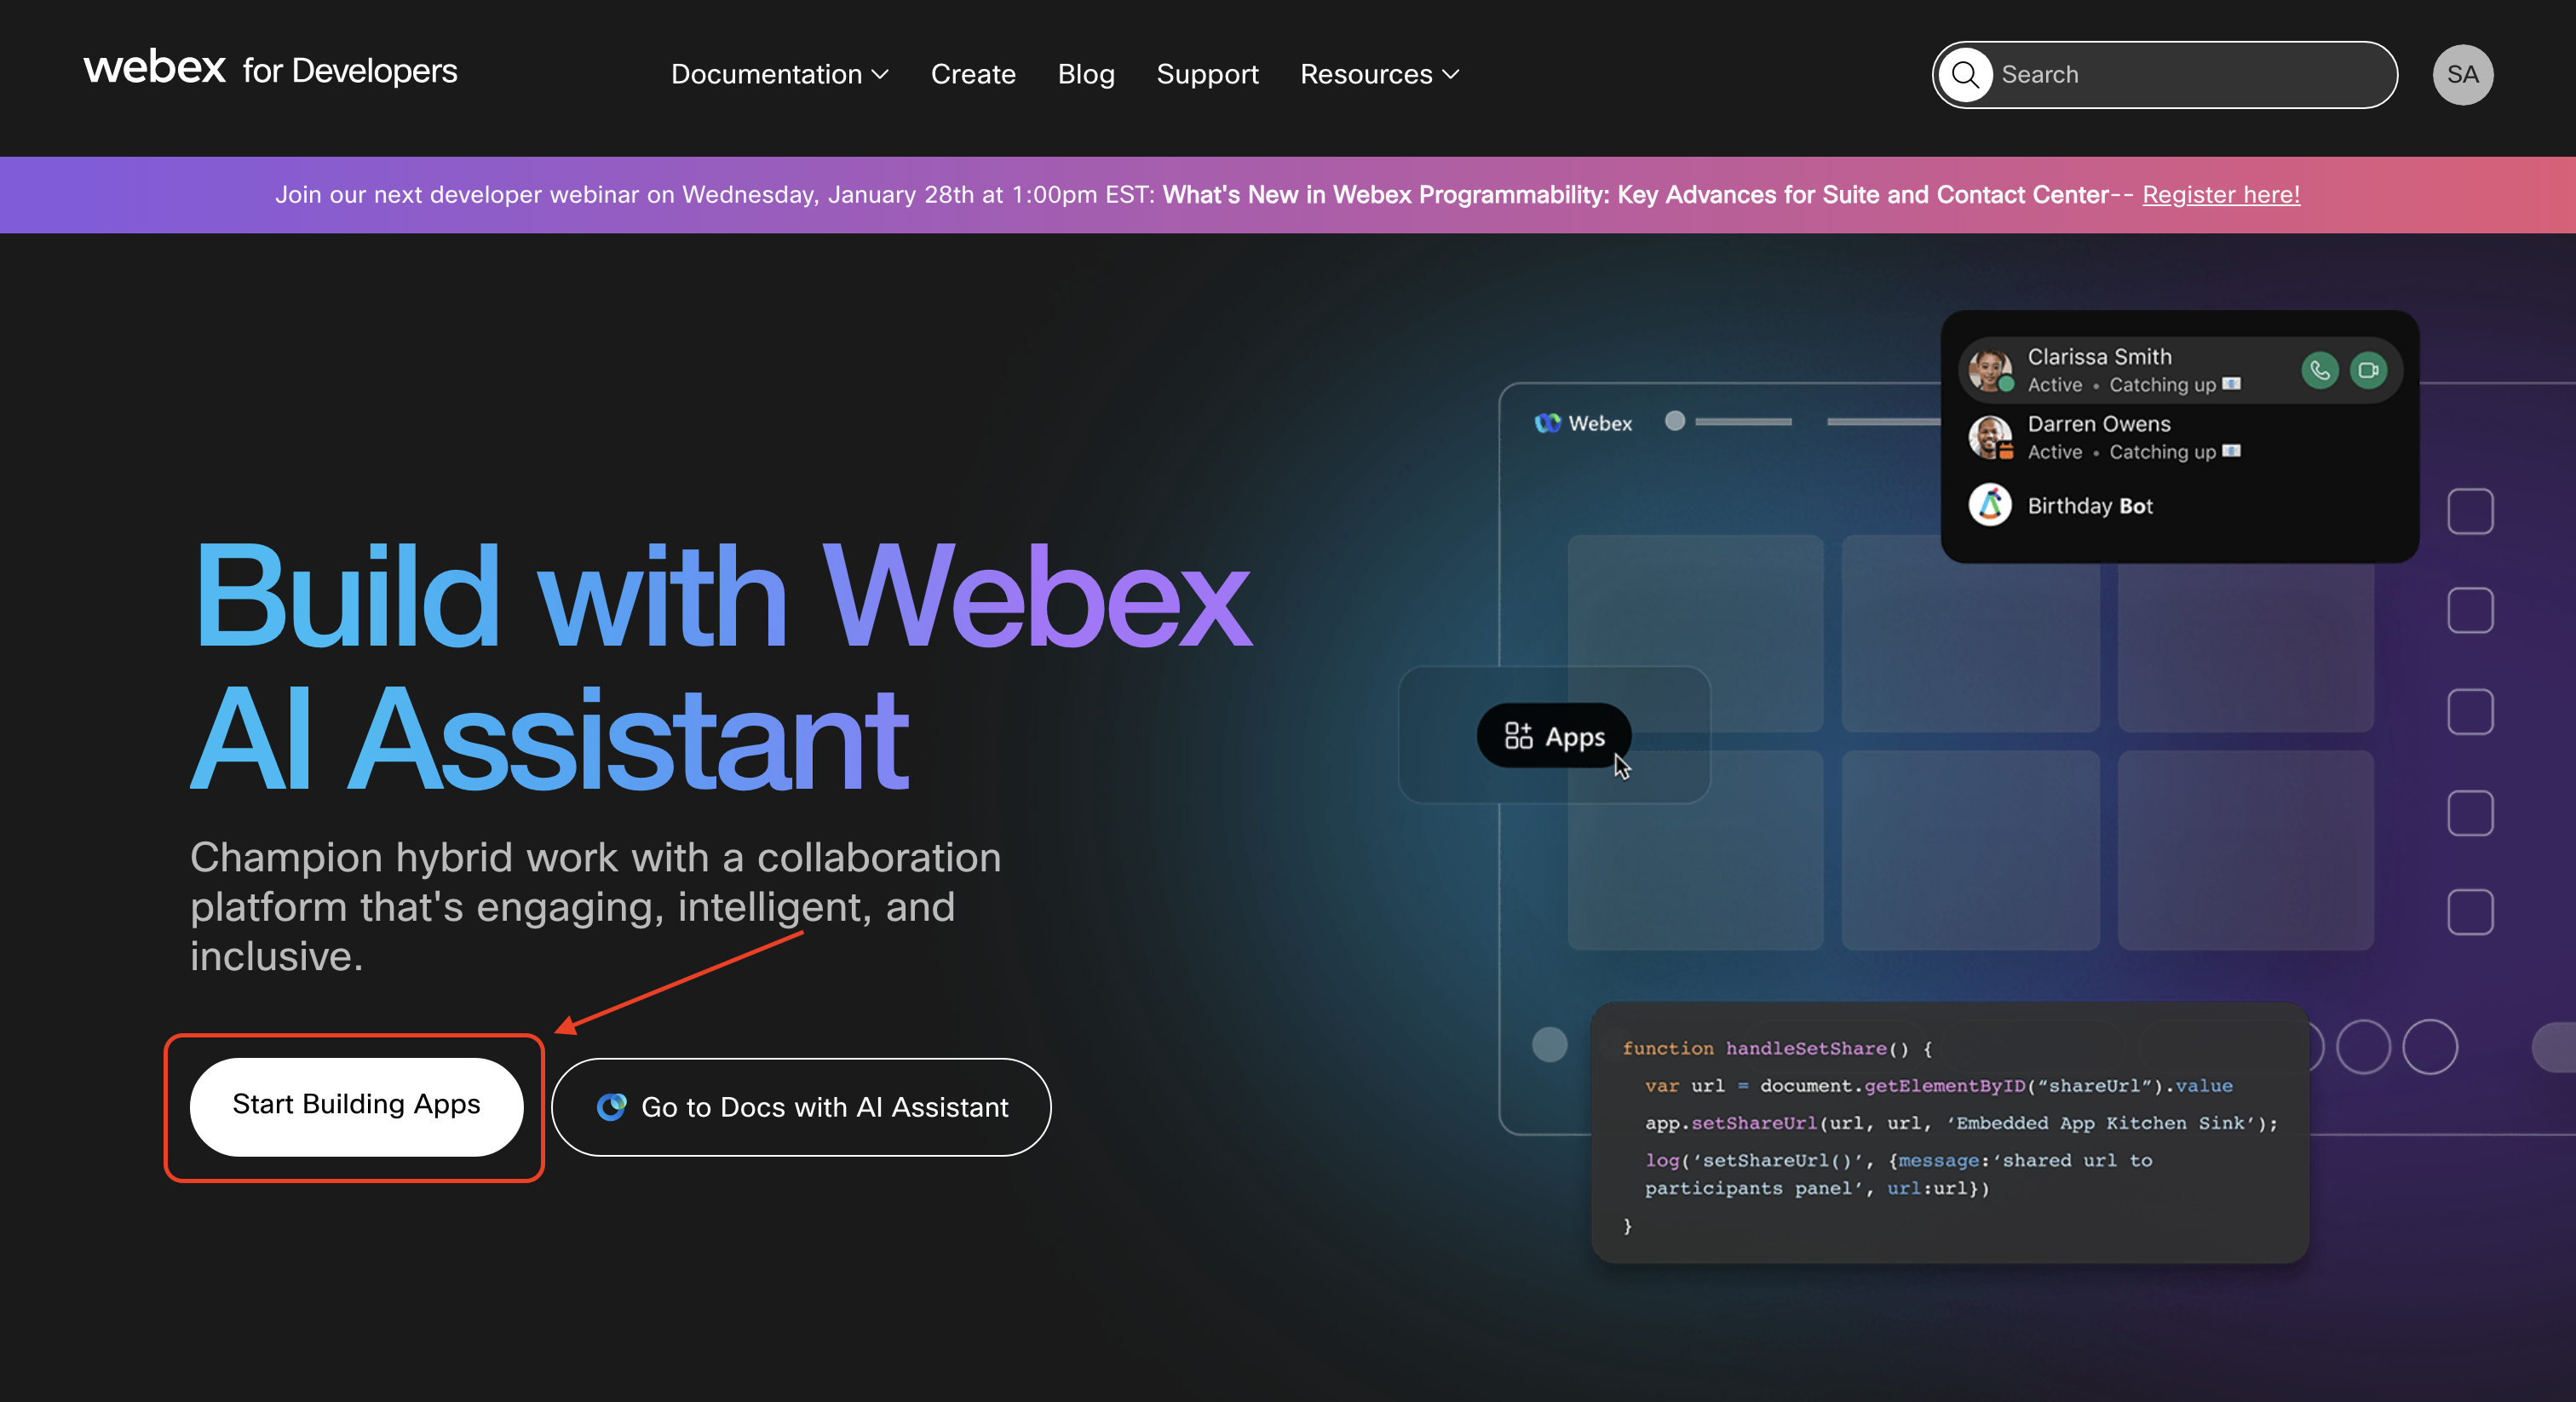
2. Click Start Building Apps
On the home page, click Start Building Apps to access the app creation interface.
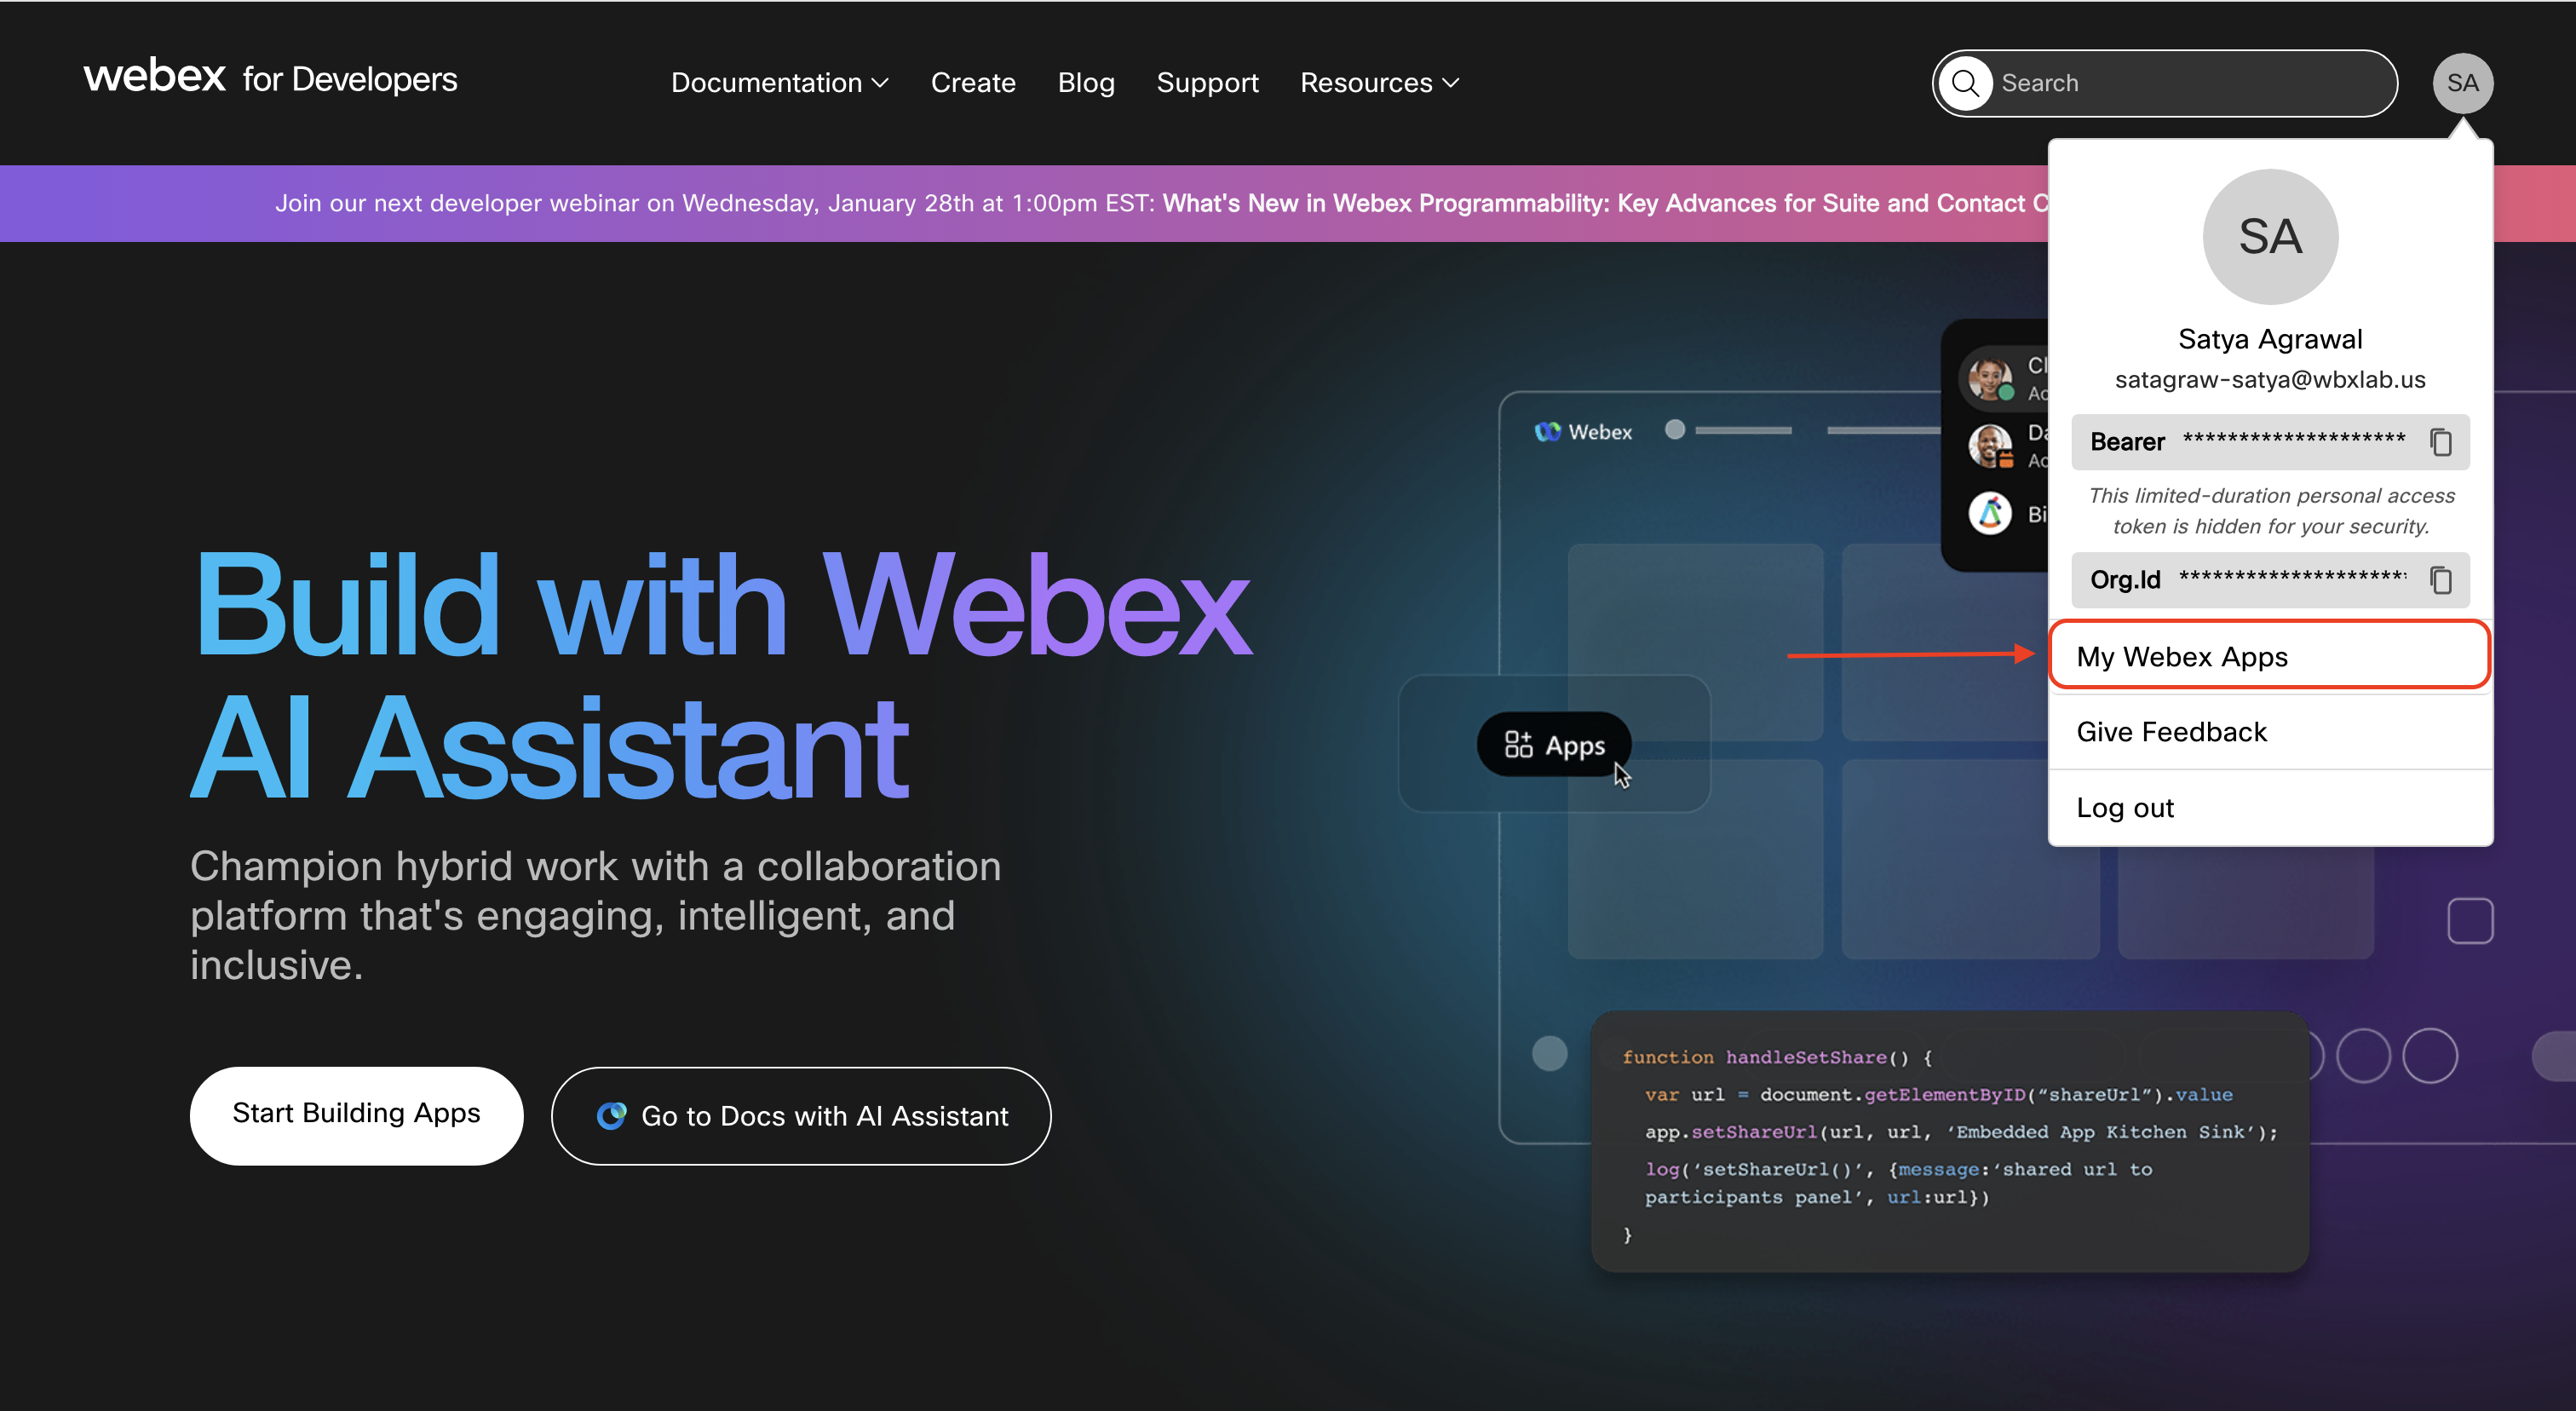
Alternatively, you can click on your profile, select My Webex Apps from the dropdown and click on Create a New App on the My Apps page that appears (you will directly be taken to the app creation interface if you don't have any pre-existing apps).

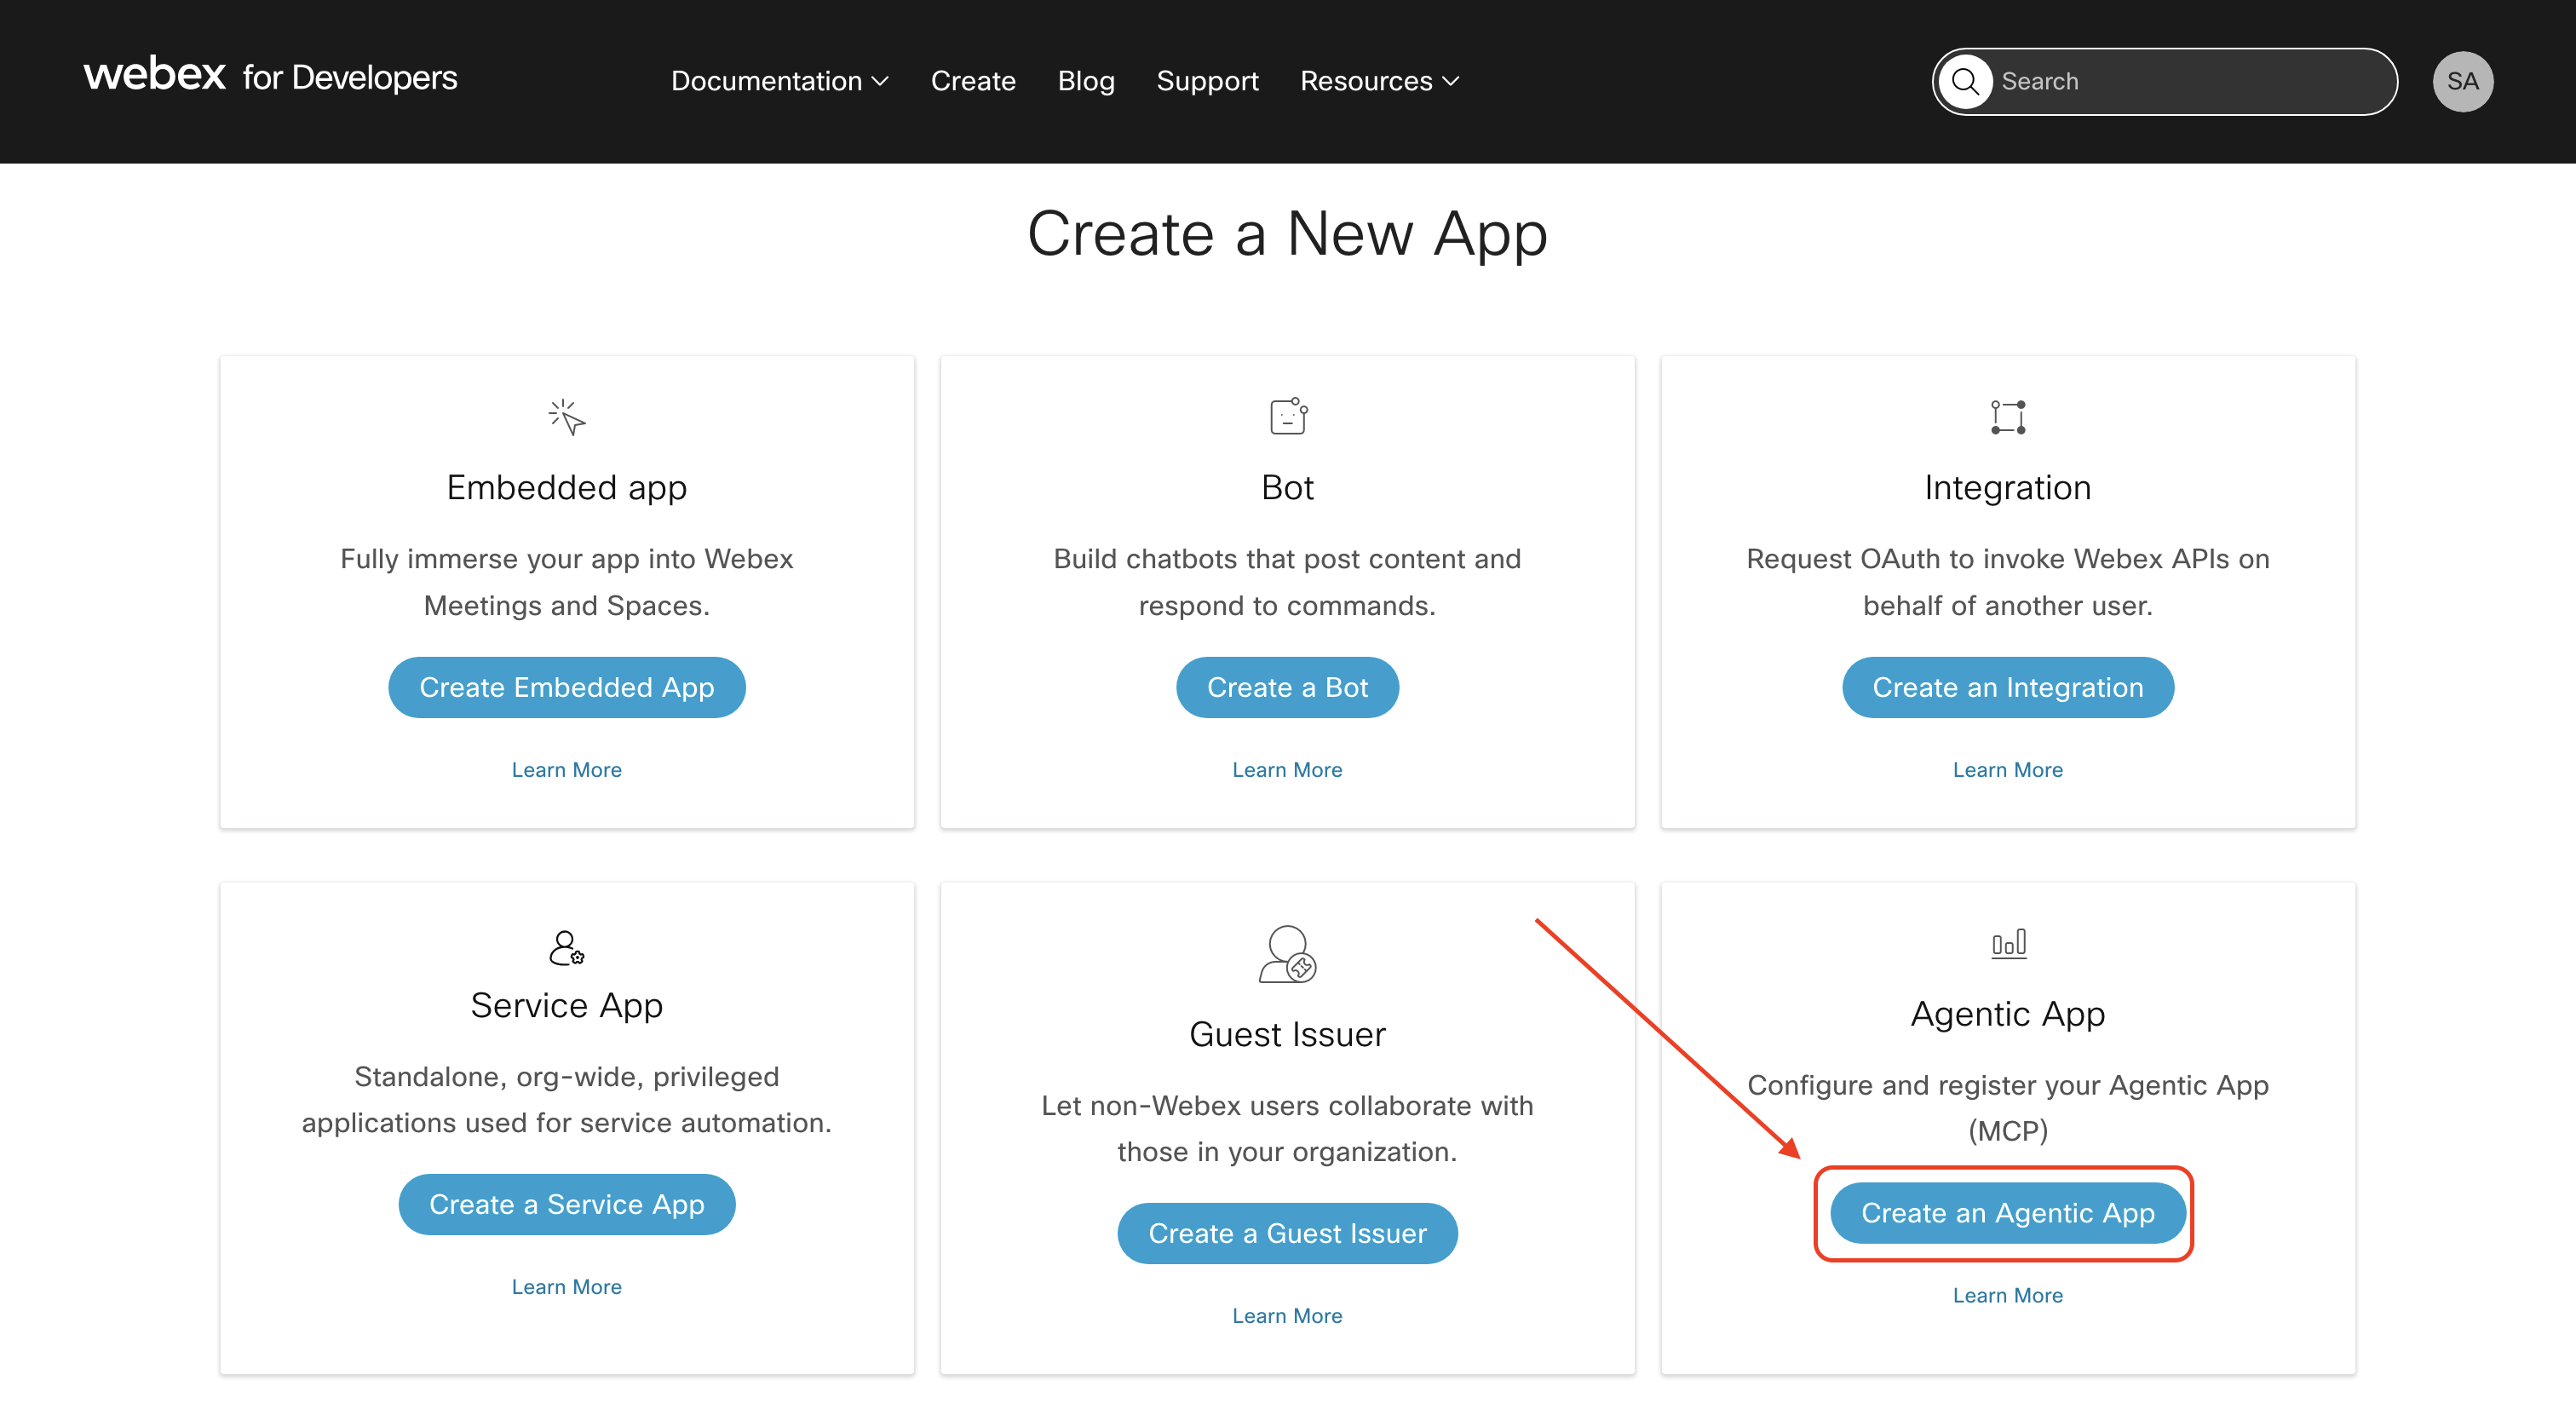
3. Select Create an Agentic App
From the Create a New App page, click Create an Agentic App to begin the agentic app registration.
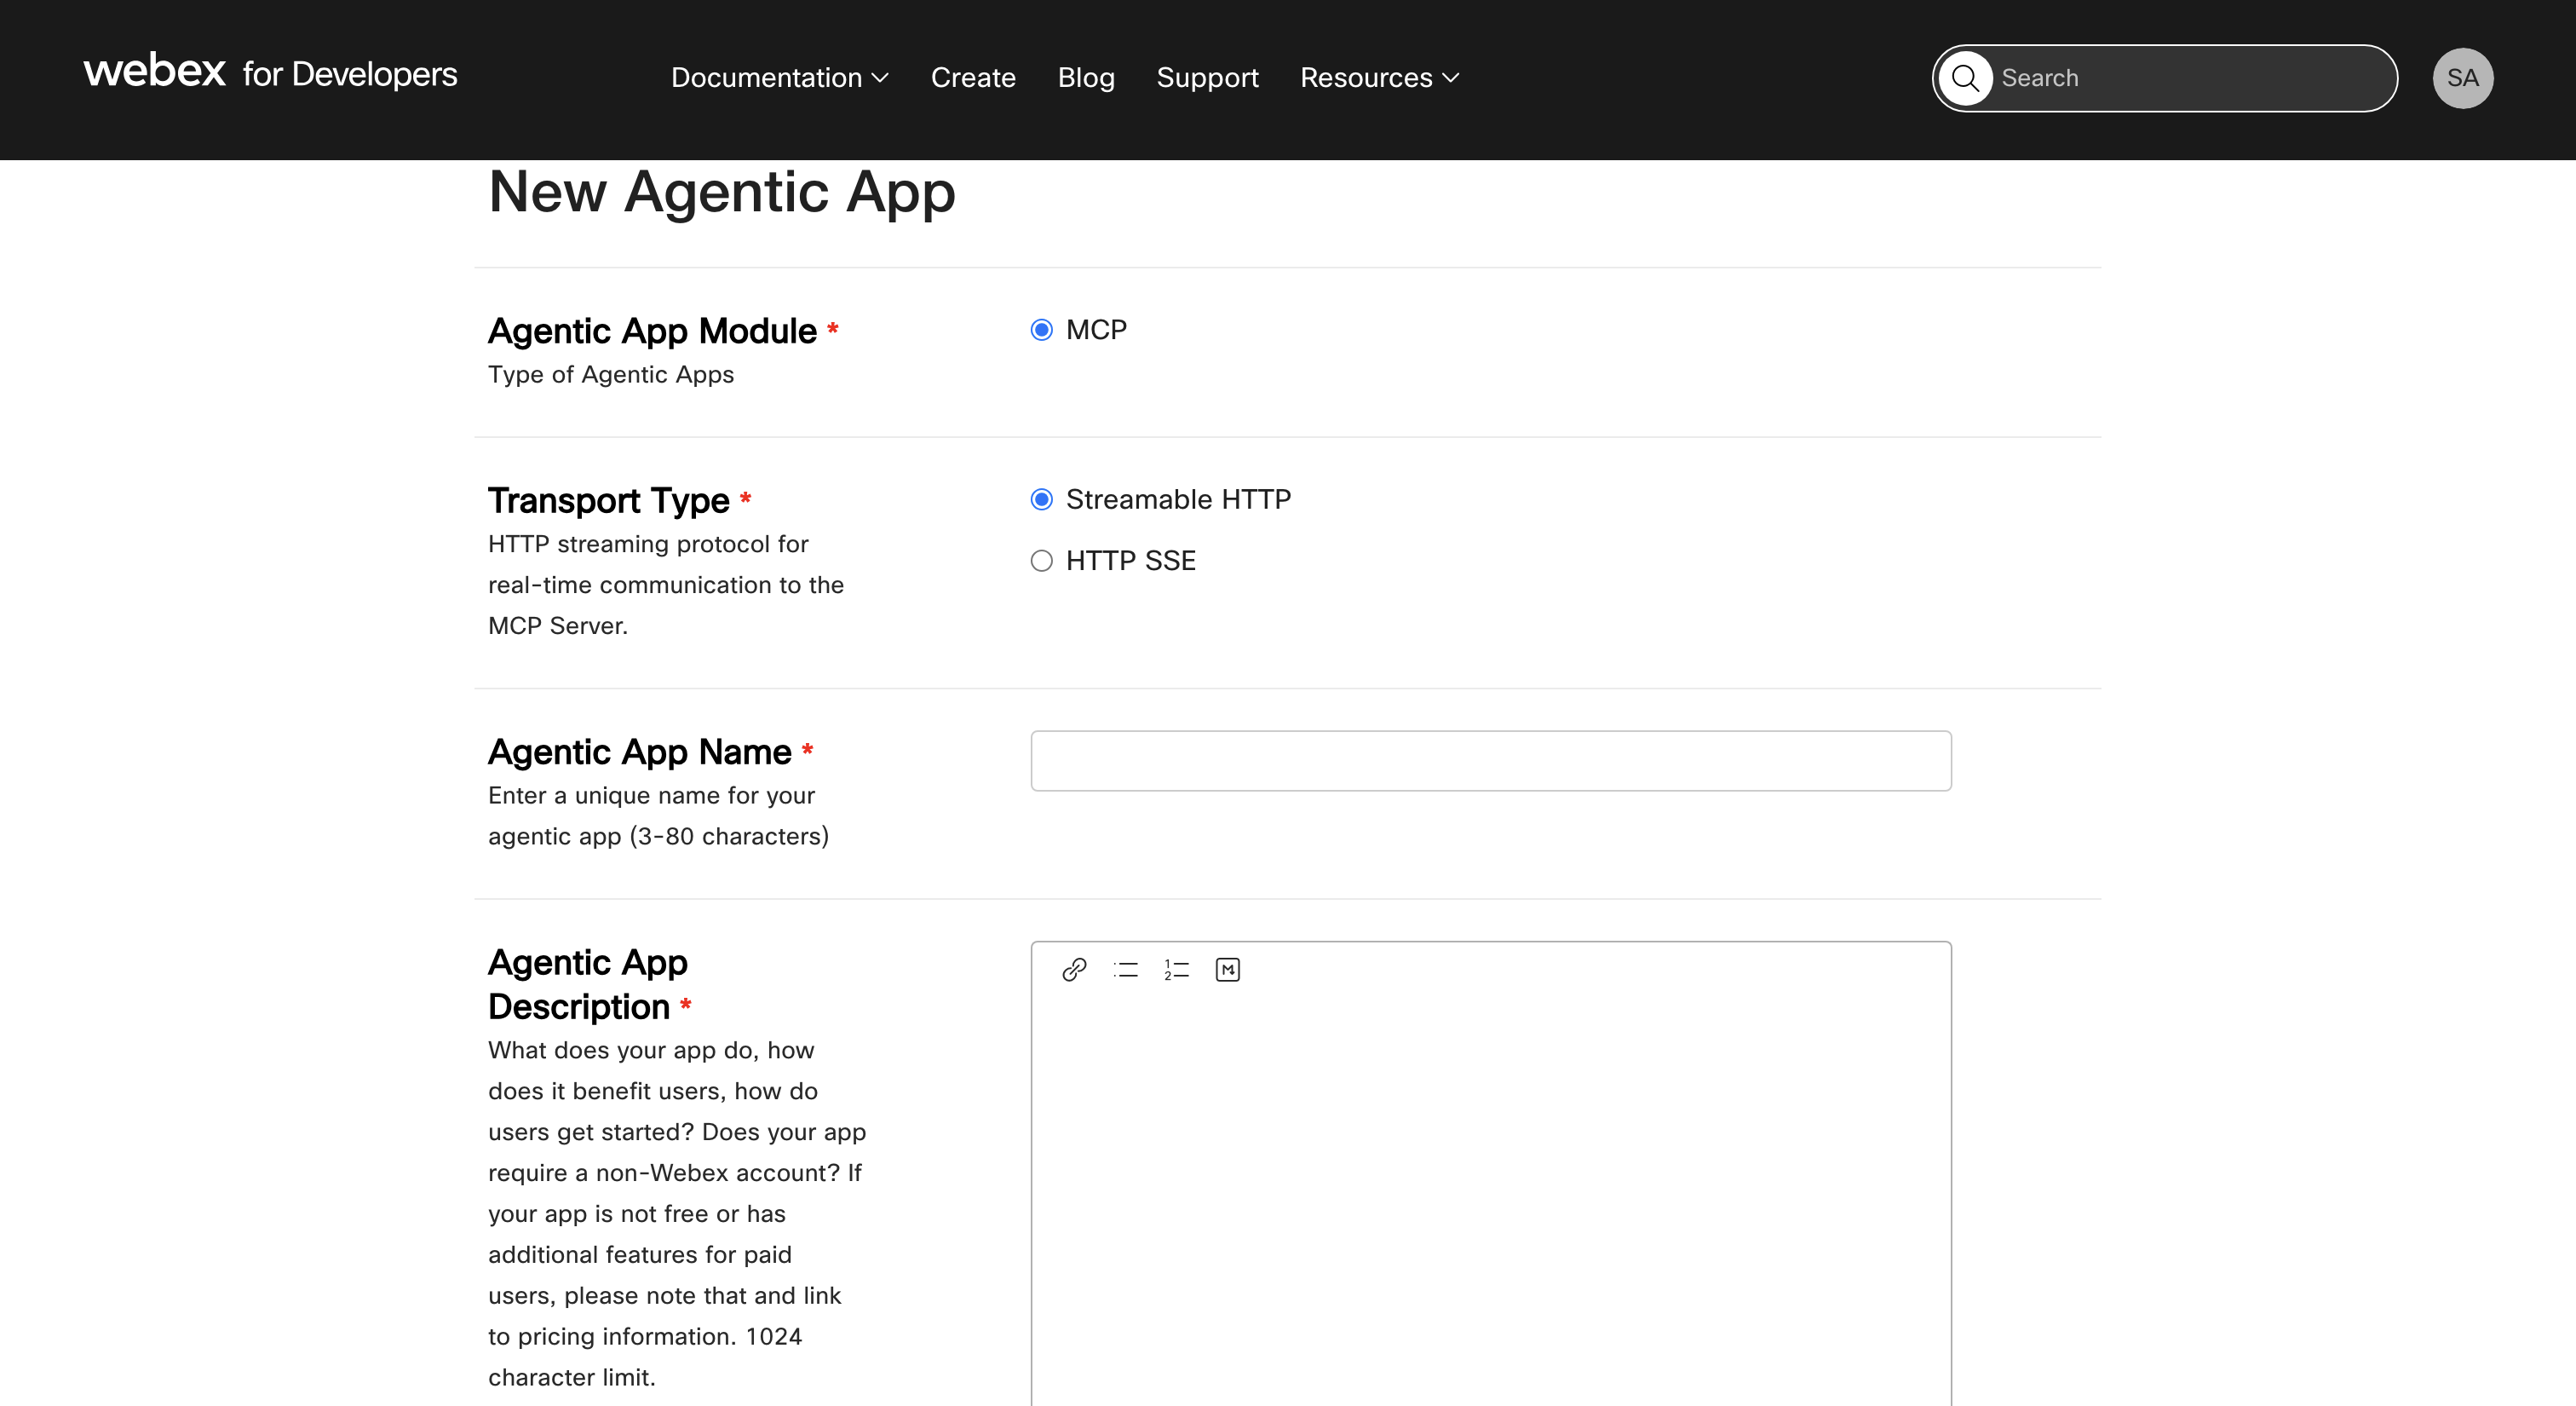
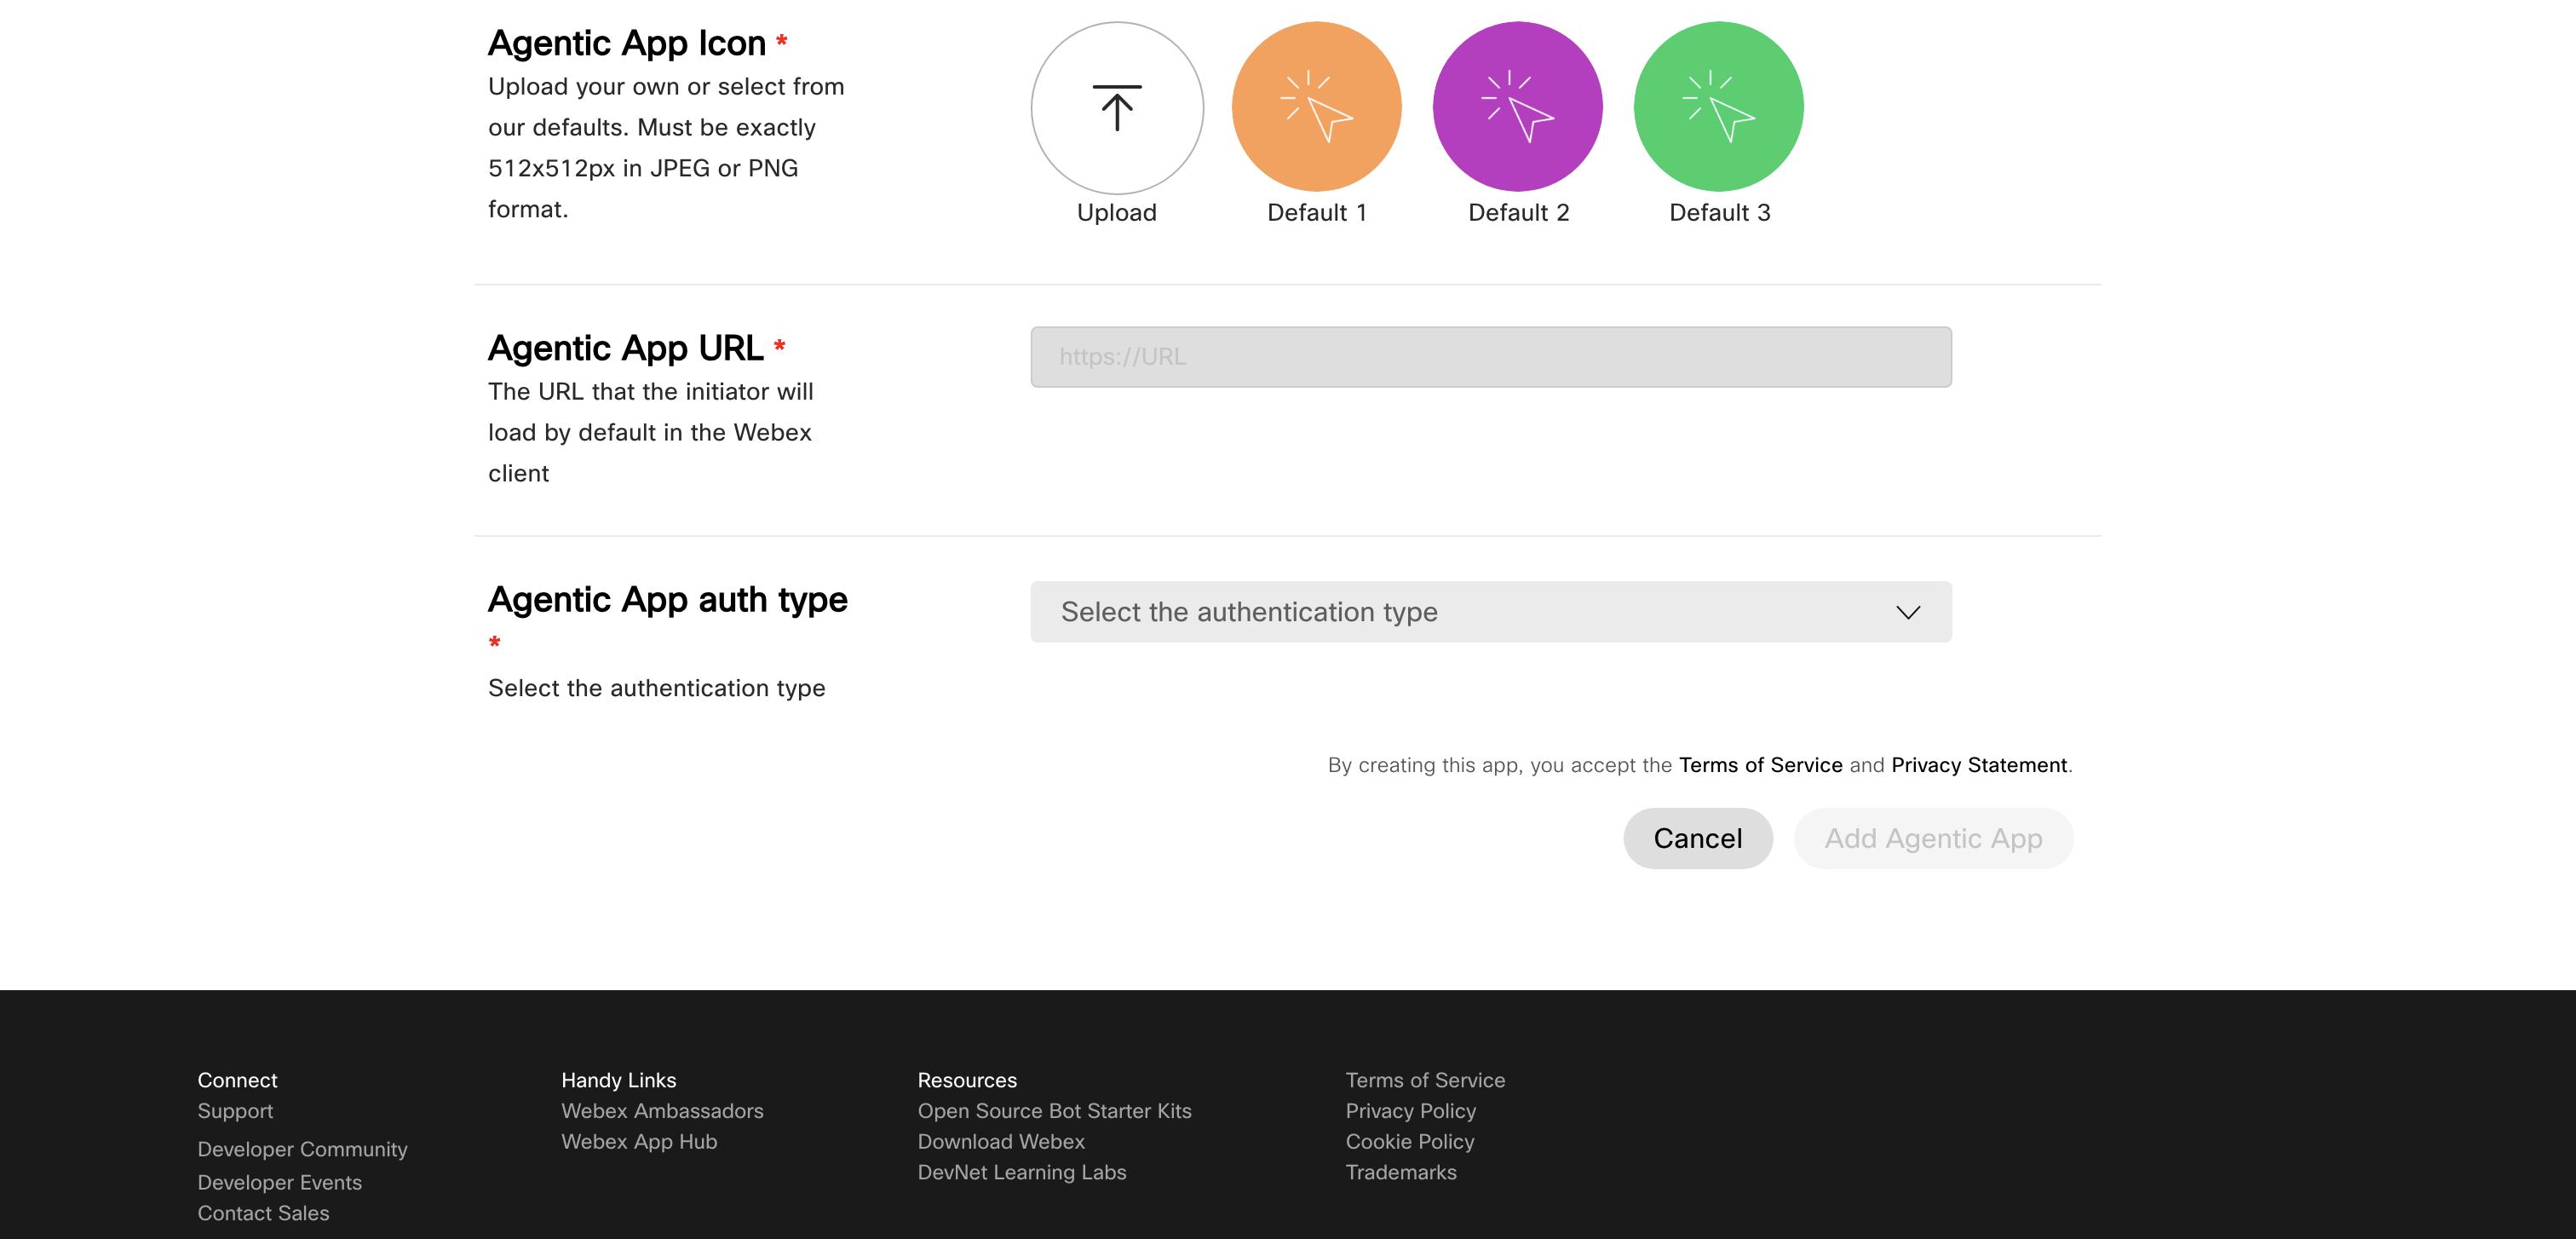
4. Enter App Details
Fill in the following fields:
- Module: Select
MCP(A2A coming soon). - Transport Type: Select
Streamable HTTPorHTTP SSE. - Name: Unique name for your app.
- Description: Clear description of its purpose.
- Logo: Upload a 512x512 PNG/JPEG (or select from 3 default options).
- App URL: Public HTTPS endpoint.
- Auth Type: Choose from:
OAuth2_clientCredentialsOAuth2_authorizationCodeApiKeyUserTokenCustomHeaderAuth
5. Click Add Agentic App
After completing all fields, click on the Add Agentic App button at the bottom of the registration page. The system will register your app and redirect you to the details page.
The details page can also be accessed by going to the My Apps page and selecting the app you registered.
