Getting the most from your Buttons and Cards design
July 14, 2020

We recently announced the availability of a new Buttons and Cards designer and support for Adaptive Cards Schema 1.2. In this blog post I'll describe some tips and tricks for optimizing the design phase of your buttons and cards. You will be ready to hit the ground running when you write the application logic that will post cards and respond to button presses.
anchorGet up to speed on buttons and cards with cardSchool@webex.bot
anchorIf you already familiar with the basics of creating a Webex messaging app but haven't played with buttons and cards yet, Card School is a handy open source bot that will walk you through all the aspects of Buttons and Cards and give you all the info you need on the mechanics of adding cards to your messaging apps. It will provide an overview of what cards are and how they work. It'll even introduce you to advanced topics such as templating, which allows you to decouple your card design from the data that you want to display on your card.
If you aren't familiar with creating a Webex messaging app, a recent blog post entitled From Zero to Chatbot in 15 Minutes is a great place to start.
anchorLook at samples in the designer
anchorThe Buttons and Cards Designer comes with a basic sample to help you get going, but you can actually start from more samples than just that initial one. Each lesson in the Card School bot provides a link that shows that lesson's source in the designer. Another handy bot Card Sampler, provides a set of different cards that demonstrate various aspects of the Adaptive Card schema. Create a space with this bot to play with the different samples. If you find one that is close to what you would like to do, follow the link to the view it in the designer. Finally, if you know a developer who has created a card design you like, ask them to share their design JSON. You can paste this directly into the Card Payload Editor in the Designer.
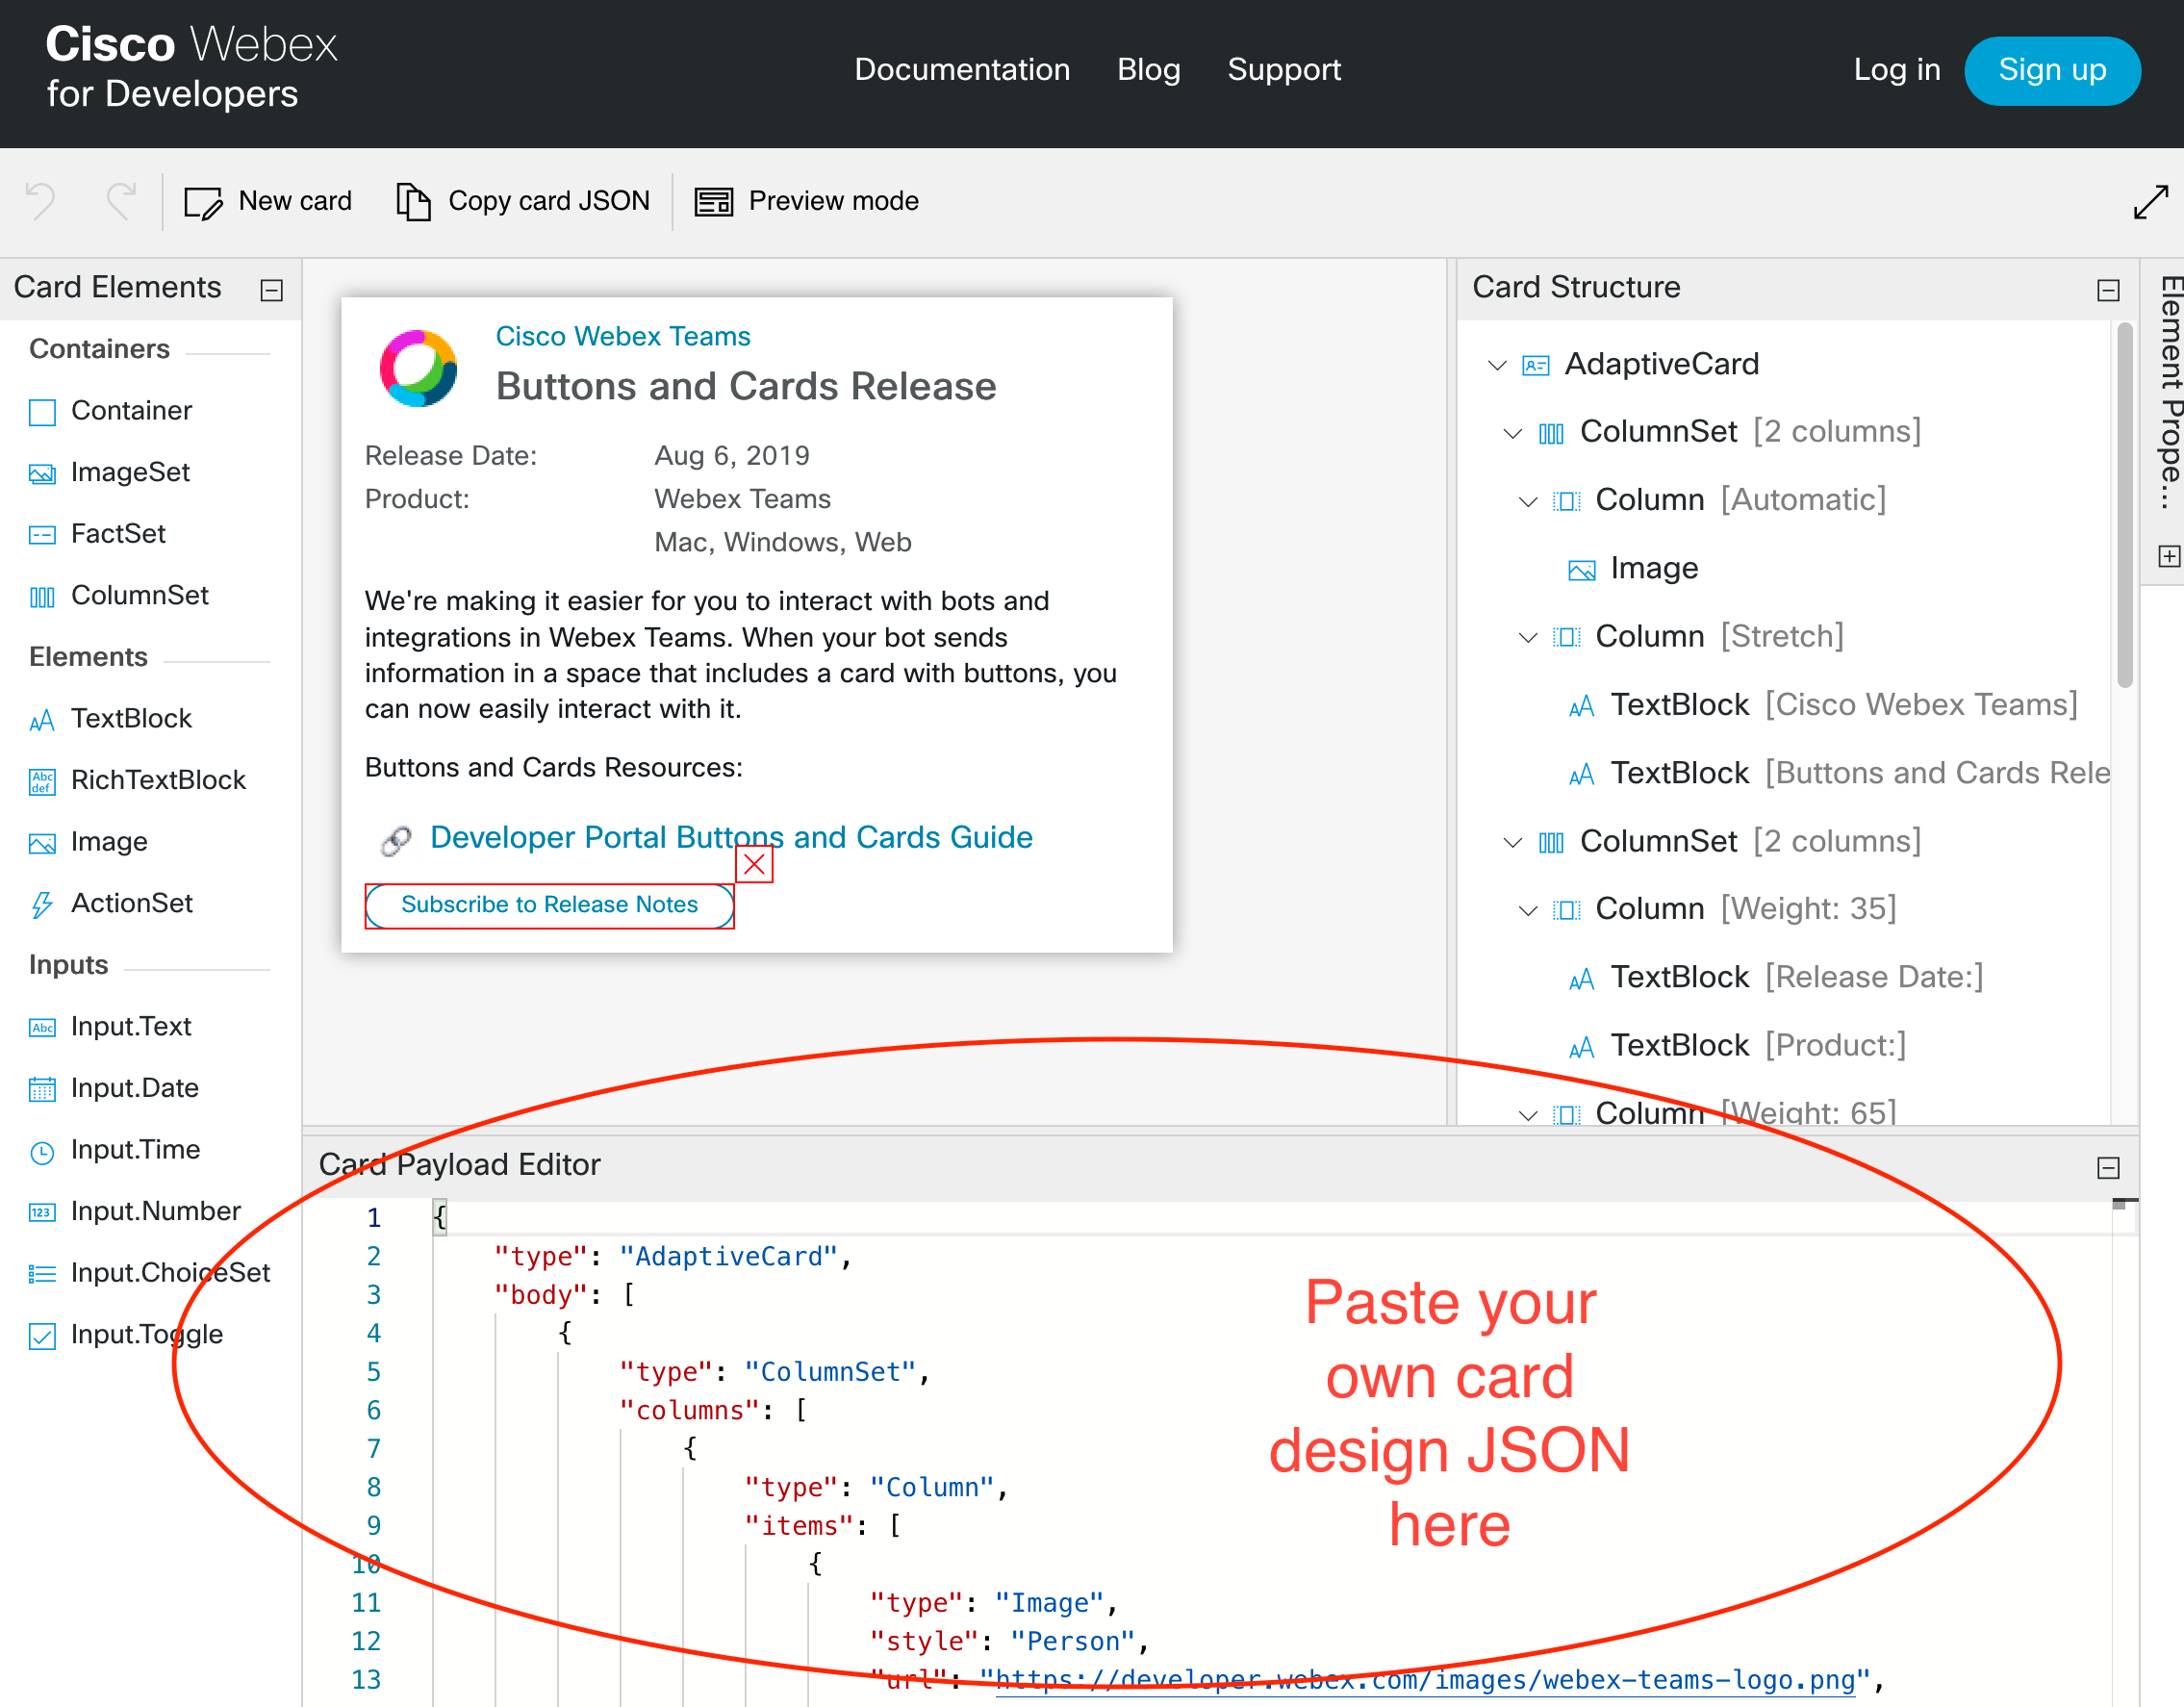
anchorTry your design in the clients with cardSampler@webex.bot
anchorThe Buttons and Cards Designer does a great job of showing you what your card will look like in the Webex Web client, but it might look a little bit different when it renders in the Mac, Windows, or Mobile clients. Ideally, you would test your design in each of the clients that users of your app will be using. But how can you try your design without writing an app to send it? Here again, we recommend using the Card Sampler bot. On the main "selection" card you will see a button "Send my own JSON Instead":
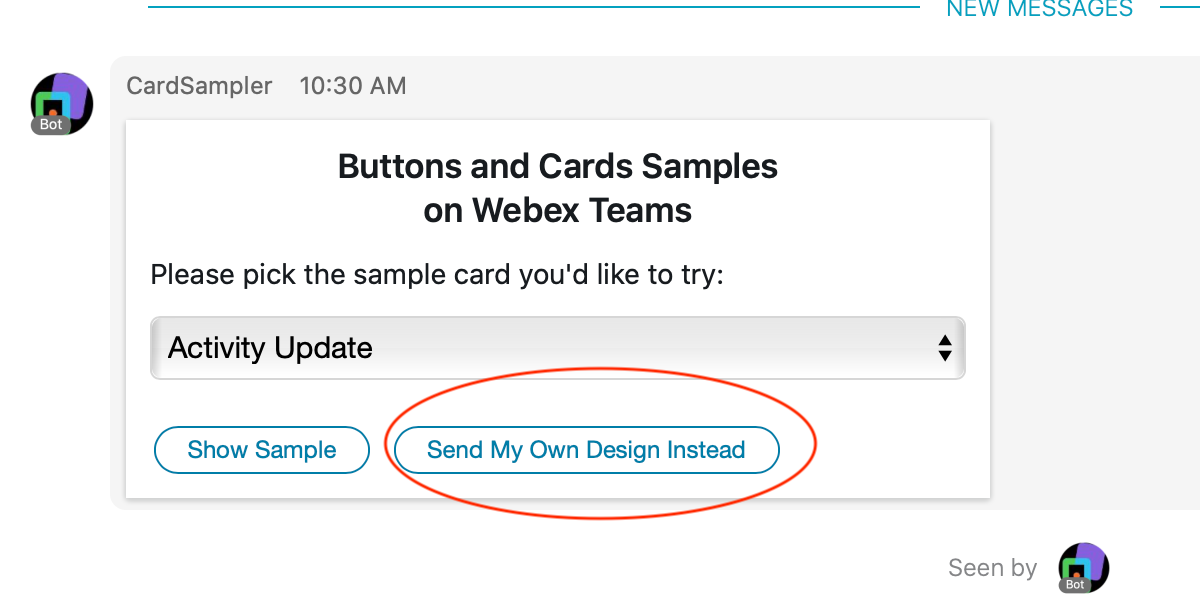
If you click this, you will get a card that allows you to paste your JSON onto a card and the bot will post your card on your behalf. (It's worth noting that you can also just send the bot a message with a file attachment and it will try to post that as well). If the card design fails to render, the bot will provide you the details of the error message returned by the Webex API call which you can use to tweak your design.
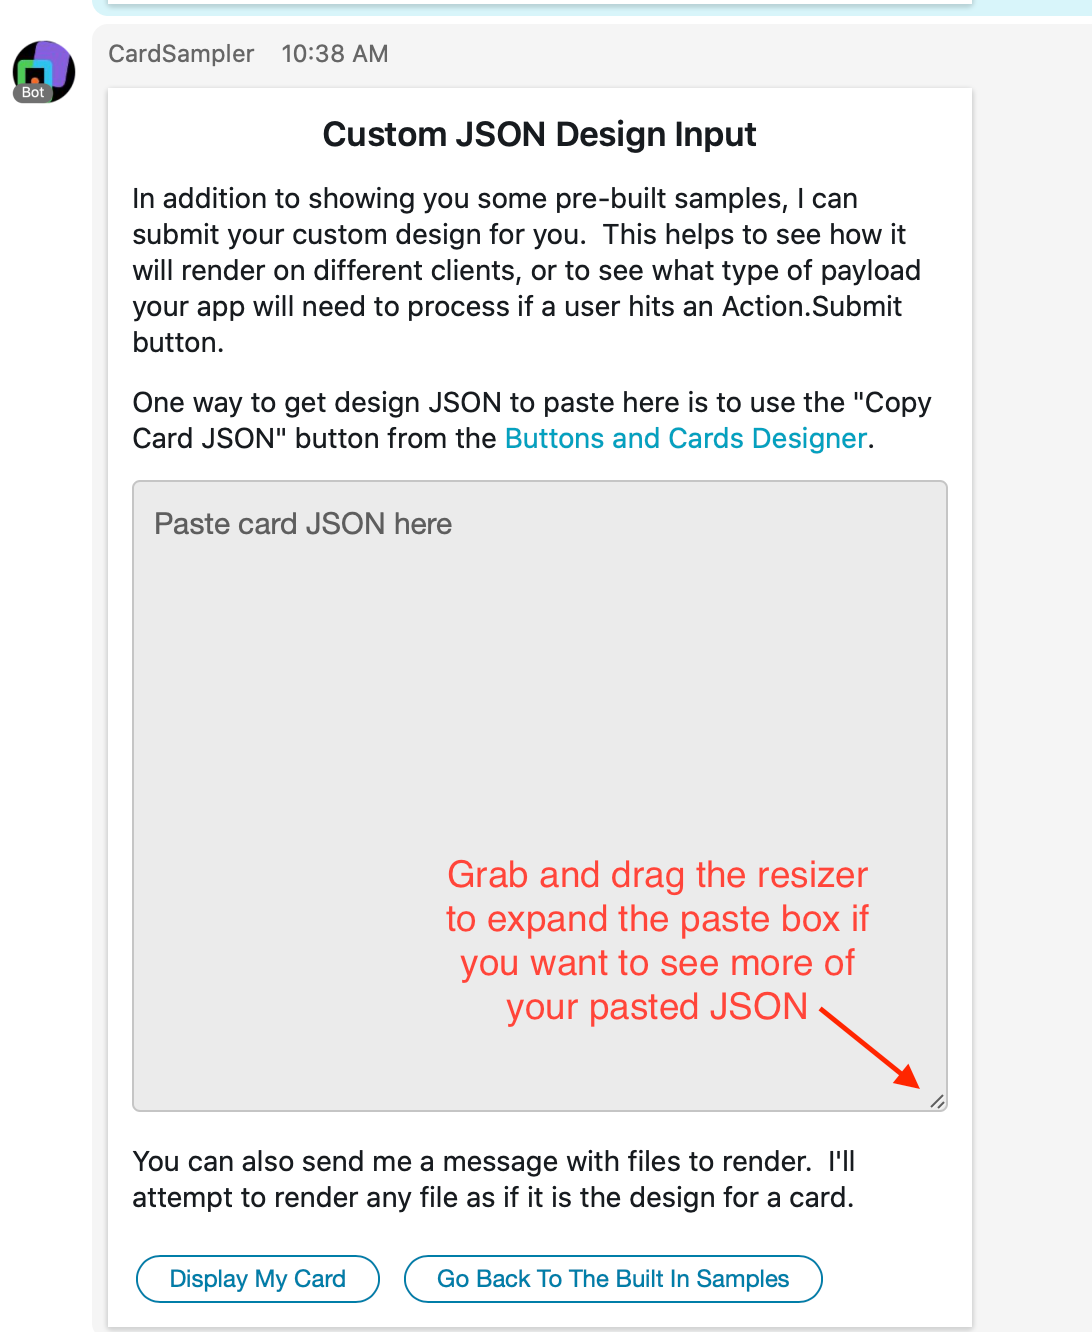
anchorDon't neglect the design of your Action.Submit payloads
anchorGetting the look and feel of your card is important, but if your card includes any Action.Submit buttons, it's also important to understand the data that will be sent back to your application for processing. Getting this nailed down in the design phase will make it much easier when it's time to implement the button press handlers in your application code. As a rule an Action.Submit button press is going to pass back any information collected in any Input elements in your card, as well as any additional info that you specify in the data attribute of the Action.Submit element itself. It's not always obvious what the payload of that attachmentAction is going to look like when designing the JSON, but here again the Card Sampler bot can help. Using the methods described above, have the bot post your custom design. If it renders successfully go ahead and fill in any input fields and/or click on buttons. The bot will send the full body of the attachmentAction that was sent to the app in response to the button click which will allow you to make sure that you are capturing everything you need to, and to document what the key/value pairs are that the app developer should expect.
anchorWatch out for the gotchas
anchorIt's easy and fun to design a card using the Buttons and Cards designer but it is not impossible to design a card that looks good, but might be missing key required attributes in order to function. As an example, you might forget to assign a unique id to each Input type element that you add to your card. Webex needs a unique value for each of these so that when a user hits the Action.Submit button the attachmentAction.inputs that your app receives will have a unique key/value pair for each of your inputs.
Before you try sending your card design from an application, click the "Preview Mode" button in the Designer. This will let you see how certain interactive elements will render, and also perform validation on your design JSON, helping you catch errors earlier in the process.
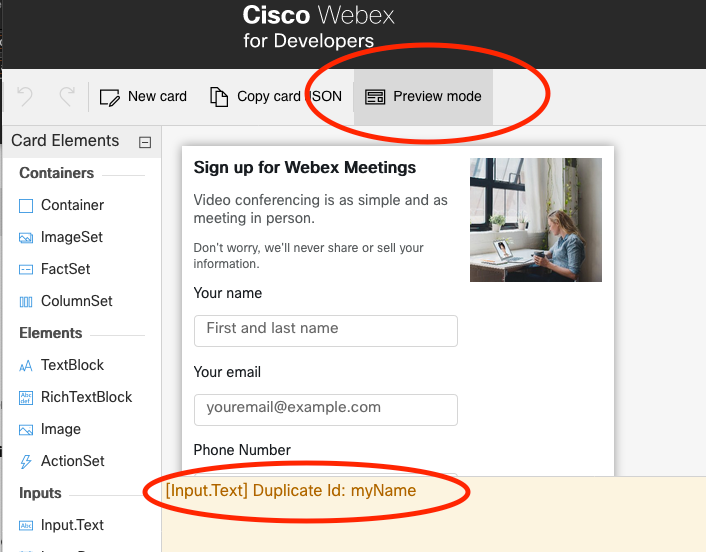
Even after validating your card in designer, you can still run into some problems. As documented in the Buttons and Cards Developers Guide, there are limitations to the size of a card, and the number of images that can be displayed in a single card. It's easy to whiz past these when you are being creative in the designer, so test your JSON out with Card Sampler. The bot will give you feedback if you have hit any of the limitations.
anchorHave fun!
anchorOnce you get the hang of working with Buttons and Cards, they can be a lot of fun to design and use. If your app is displaying or collecting any type of complex information at all using Webex, buttons and cards can transform the experience for your users, and, in the case of collecting complex input, really simplify your application development as well.
Let us know how you are using buttons and card! Drop us a note in the Ask Buttons and Cards discussions space.
