From Zero to Webex Chatbot in 15 Minutes
July 19, 2023

This blog post was originally published in December 2019 and has now been updated for 2023.
If you are looking for the basics on how to create a Webex messaging bot, you have come to the right place. This easy to download, easy to run sample allows would-be developers to get a simple bot up and running in 15 minutes and provides a structure for building more complicated bots.
Webex currently powers thousands of bots with a variety of functionality, ranging from simple chat bots that provide specific information like the current weather, to more sophisticated bots that understand natural language and automate complex business tasks. Perhaps you've been wanting to deploy a handy chatbot of some kind and just haven't gotten a chance to start on it yet. Well, this is your big chance!
Back when Webex (then called Spark) bot functionality was first made available, there were several simple starters. We always liked the old sparkbotstarter that was created by Victor Algaze, using a framework called Flint, which was created by Nick Marus. This sample is based on the updated, Webex community library webex-node-bot-framework, and adds a few fun new tricks, like posting a message using Webex Buttons and Cards.
Getting Started
Even if you don't have any prior knowledge of the Webex APIs, this guide will have you deploy a functioning chatbot application pretty quickly. Then from there, the bot-starter application can serve as a template for creating your own customized bots and can be extended to your heart's content. You might need to be at least a little familiar with node.js and also have the following prerequisites:
Node & npm (minimum tested version is node 8.0.0 or higher) and git installed on your machine
A Webex account: https://web.webex.com/
Sign into Webex
The first thing to do is use your regular Webex credentials to log in to Webex for Developers and create a new bot. When you create the bot account, be sure to jot down the bot’s username & access token before leaving the creation page - we'll need those in a minute.
Set up the Local Web Server
The bot application has to be hosted on a server where it can communicate over HTTP. For now, we'll use nGrok, which is a tool that turns your machine into a web server by opening a local port to the Internet. We're doing this so we can start using our chatbot as quickly as possible without having to think about deployment or hosting. Since we are aiming to start testing now, nGrok uses the least number of steps to get there.
nGrok can open up the machine it is installed on to security risks and needs to be done only in a non-prod setup that is completely distinct from any other production services or systems. Once you’ve customized your chatbot, you should deploy it on a proper cloud hosting service, such as Microsoft Azure or other similar platforms, instead of your machine.
Download and setup nGrok here: https://ngrok.com/
After downloading and unzipping nGrok, from the same directory as the nGrok executable execute this command:
$ ./ngrok http 7001If the tunnel has trouble connecting, try adding a region code to the command:
$ ./ngrok http 7001 --region=eu
Once it's running, write down the web address that's tunneling to your localhost:7001 (e.g. https://XXXXXXX.ngrok-free.app) and keep it handy.
Configure and Run the App
Now we just need to download the project, swap in a few values, and start the bot up!
Download the node.js Webex Bot Starter template project with this command in your terminal:
git clone https://github.com/WebexSamples/webex-bot-starter && cd webex-bot-starterFrom the
webex-bot-starterdirectory, copy the file.env.localto a new file with only.envas the name. Do note these files might be hidden.Open the new
.envfile in a code or text editor and swap out the following values:
  {
    "webhookUrl": "http://XXXXXXX.ngrok.io",
    "token": "BOT_TOKEN_CREATED_FROM_EARLIER",
    "port": 7001
  }
Note that if/when you turn off nGrok, when you turn it back on the URL will change and you will need to update the config with the new address.
Save the changes to
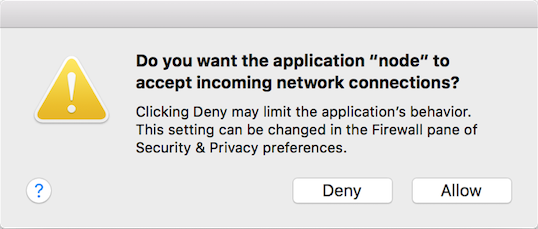
.envfile.Finally, to install and start the application, run this command:
$ npm startIf you're using a Mac, you might receive a prompt asking about “node” accepting incoming network connections. If so, click Allow to load the server:
Interact with the Bot in Webex
Now that the nGrok server is loaded and the app is running, create a new group space (name the title whatever you want) in the Webex client. Next, add your bot to the space (by the username you created earlier), just as you would add any other Webex user.
If everything was done correctly, your bot should have greeted you with some instructions when it was added to the space. You now have a running chatbot! To go further, open the index.js file in an editor and extend functionality as much as you need.
Helpful Resources
This bot starter application is based from the webex-node-bot-framework:
Intro to the Webex for Developer platform:
Webex Bots explained:
Guide for creating Webex Buttons and Cards in messages: