Face & Hand Tracking in Webex
November 29, 2021

With the Webex JavaScript SDK, we have access to our local media stream. This means that we can build an app to receive our local camera feed, take some action on it, and apply it as our outbound stream to a Webex meeting. That way, if we wanted to apply a filter to ourselves, the other users in the Webex meeting would see the filtered version of our feed.
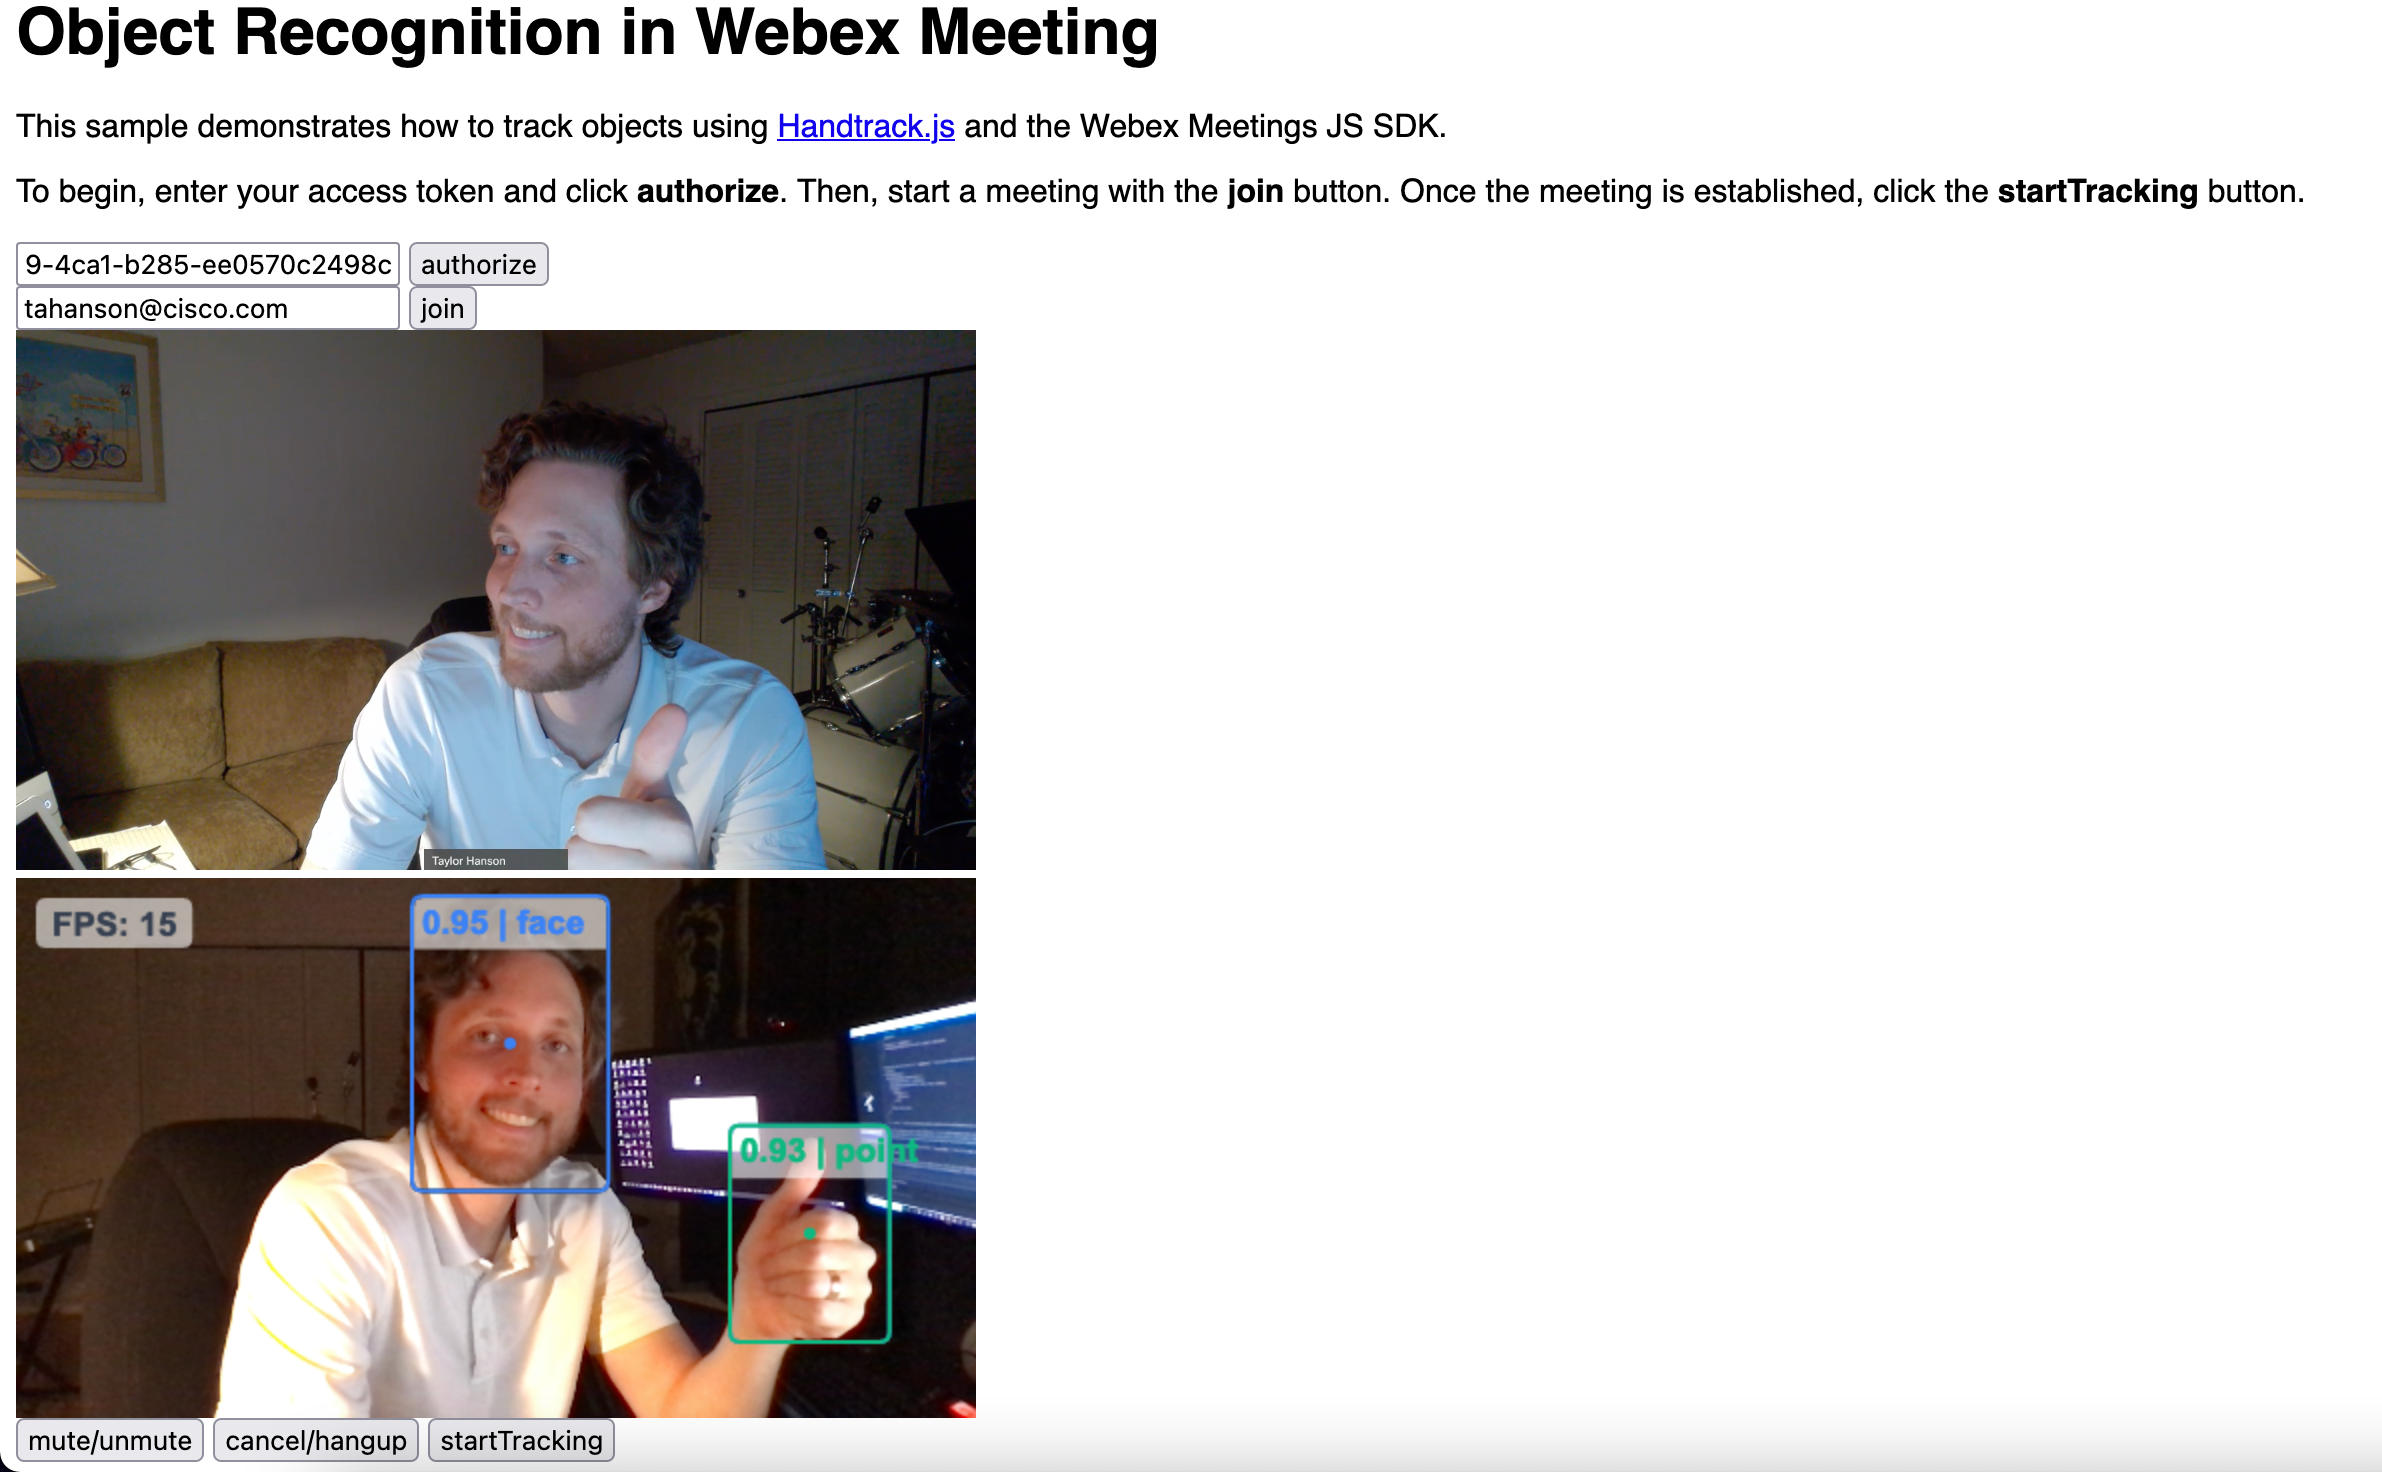
The demo application we're writing about here leverages handtrack.js to detect faces and hands. Handtrack.js is built using tensorflow, which is a popular open-source machine learning library for JavaScript. In short, our demo app uses the Webex JS SDK to join a meeting, and uses the handtrack.js library to "edit" our camera stream, which is then applied to our Webex meeting.
If you're new to Webex programmability, you can learn more about the Webex Browser SDK, as well as the other available SDKs from https://developer.webex.com. However, this application should provide everything you need to get started, and we'll cover some of the basics here as well.
The full source code for our app is available on GitHub.
The Code
The bulk of the work for this demo app happens in index.js, so you can mostly assume the snippets and work referenced here occur in this file.
Joining a Webex Meeting
Joining a Webex meeting requires 5 main steps with the JS/Browser SDK. They are:
- Webex.init() / webex.meetings.register()
- webex.meetings.create()
- meeting.getMediaStreams()
- meeting.join()
- meeting.addMedia()
You can read more about this process from this blog. The one thing our app does in addition, is it allows us to update our video stream for the Webex meeting, using the updateVideo() function. Once an outbound media stream exists for the meeting, you can use the updateVideo() function to apply a different MediaStream object as your video source. So we know how to update the video stream for a Webex meeting, but how do we manipulate our local stream in the first place?
Handling our Camera Feed
Before we join a Webex meeting, we can bind various event listeners to our meeting instance. For example, for our app to know whenever someone starts sharing, we can bind an event listener like this:
meeting.on('meeting:startedSharingRemote', (payload) => {
  console.log(`meeting:startedSharingRemote - ${JSON.stringify(payload)}`);
});
We can use the same idea to grab the remote and local video feeds:
// Handle media stream changes
meeting.on('media:ready', (media) => {
  if (media.type === 'local') {
    toggleVideo();
  }
  if (media.type === 'remoteVideo') {
    document.getElementById('remote-view-video').srcObject = media.stream;
  }
}
Referencing the above code snippet, toggleVideo() is how we start tracking faces and hands. Our app starts this as soon as we know we have a local stream available. toggleVideo() calls the function runDetection(), and our runDetection() function looks like this:
function runDetection() {
  model.detect(testVideo).then(predictions => {
      console.log("Predictions: ", predictions);
      model.renderPredictions(predictions, canvas, context, testVideo);
      if (isVideo) {
          setTimeout(() => {
              runDetection()
          }, 100);
      }
      $("#local-video").hide();
  });
}
The detect() function from handtrack.js, as well as renderPredictions() are the two functions that are doing the heavy lifting.
This is where things can start to look a little funky. If you've looked through the code, you might have noticed that canvas and context variables are initialized. This is because the handtrack.js library we're using writes the altered stream to an html canvas element (when we renderPredictions()). This means we have to read the canvas stream back in, then apply it as our outbound stream. Ideally, we would apply the face and hand bounding boxes directly to the outbound stream, rather than write it to a canvas element just to read it back in. This is merely a limitation of the library we're using here. The only requirement for our outbound stream is that it be a WebRTC MediaStream with a video track. Conveniently, the captureStream() function of the canvas element returns this MediaStream object to us. So, even though we had to apply the altered video to a canvas element first, we can easily grab the result with the captureStream() function.
Once we have the altered video (which we do from captureStream()), then we can simply use the updateVideo() function.
Conclusion
We can open our index.html file in a browser to see this demo in action! You'll need to copy a Webex token into the authorize field, and click the authorize button. Assuming you have a Webex account, you can grab a 12 hour test token by signing into this page and clicking the copy icon. After you authorize, you can enter a Webex meeting link, Webex person email, or API roomId and click join. Once you have joined a meeting, you can click the startTracking button to see the face and hand bounding boxes - and the other meeting participants will see them too!

If you have any questions about this app, please feel free to reach us at wxsd@external.cisco.com, and if you have any questions about the Webex APIs or SDKs you can reach developer support any time!