Device Grant Flow, You Got It!
February 26, 2025

Have you ever wondered how you might accomplish a seamless login experience within your integration for your Webex users who are using a Webex Board, Desk Pro, Room Kit, tablet, mobile device or any other device that has a limited input device setup? Wonder no more, as Webex has you covered with support for the OAuth 2.0 Device Grant Flow. Webex supports this seamless flow, which can enrich user's interactions on input constrained devices or devices without suitable browsers for traditional OAuth interactions.
In addition to ensuring a simple, and easy authorization flow. The Device Grant Flow also serves as a solution to mitigate the need for multiple Redirect URI for non-SaaS applications. Some developers have created singular/on-prem solutions, that are deployed to individual customer sites. In which brings the challenge of how you properly implement an OAuth Flow across disparate networks using the least amount of Redirect URI's. To solve this, within the Webex implementation of the Device Grant Flow. We provide multiple Redirect URI proxy URLs, which all implement PCKE (Proof Key for Code Exchange) for an additional layer of security when orchestrating the Authorization request, and Token granting to your application.
Sample Code Walk Through
To illustrate the Device Grant Flow implementation, we will be going over the Device Grant Flow Sample App from the Webex Samples GitHub repository.
This sample app is a python script that uses Flask, Webex APIs, and an access token obtained via the device grant flow. This sample application also has functionality for generating QR codes, polling and refreshing tokens, and fetching user info from Webex /people API endpoint. It uses Flask routes to manage the authorization flow, token readiness, and user data display.
In addition, in the templates/sign-in.html file, a JQuery-enabled script polls for an access token and loads the OAuth profile display page when the token is detected after authorization is successful.
Create an Integration and Retrieve Integration Authorization Information
You'll need to create a Webex integration and retrieve its Client ID and Client Secret for use in the sample script.
To create a new Webex integration:
- Navigate to the Webex Developer Portal at https://developer.webex.com
- Select Log in at the top right corner and log in with your Webex account credentials. If you don't have an account, create one.
- After logging in, select Start building apps in the body of the landing page.
- In the Integrations card, choose Create an Integration.
- Enter the following details for your new integration:
- Will this integration use a mobile SDK? Select No.
- Integration name: Enter an alpha-numeric name for your integration.
- Icon: Choose one of the default icons.
- App Hub Description: Enter a brief description, for instance,
OAuth testing integration. - Redirect URI(s): Enter the following URLs:
https://oauth-helper-a.wbx2.com/helperservice/v1/actions/device/callbackhttps://oauth-helper-k.wbx2.com/helperservice/v1/actions/device/callbackhttps://oauth-helper-r.wbx2.com/helperservice/v1/actions/device/callbackThese URLs are hosted by Webex on your behalf. And when you request a token from the Devices Authorize endpoint. We will poll these redirect URIs to obtain our access token, after a user has completed the OAuth Authorization process.
- Scopes: Select the following scope for your integration:
spark:all
- Select Add Integration at the bottom of the page to save your integration.
After saving, you will be provided with a Client ID and Client Secret. Store these securely. You'll use them in the sample app.
Install Python Modules
Install the following Python modules using pip (Note: It is highly recommended to use a python virtual environment. This will ensure no conflicts with your local version of python, and will keep the installed libraries for this sample code contained instead of being installed globally):
`pip install flask`
`pip install requests`
`pip install qrcode[pil]`
The flask module is a web framework for Python, which provides functionalities for building web applications.
The requests module is used for making HTTP requests in Python. It abstracts the complexities of making requests behind a beautiful, simple API so that you can focus on interacting with services and consuming data in your application.
The qrcode[pil] module is used to generate QR codes. The [pil] part is an extra requirement which means that it will also install the Pillow library, a fork of PIL (Python Imaging Library). It adds some user-friendly features.
Run the Sample App
To run the sample app:
- Update the .env file with your Client ID, and Client Secret that you obtained when you created your integration:
CLIENT_ID=<Client ID Goes here>CLIENT_SECRET=<Client Secret> - Open a terminal or command prompt.
- Navigate to the directory where
oauth.pyis located. - Run the Python script using the following command:
python oauth.py - Navigate to the non-loopback URL generated by the prompt, for example:
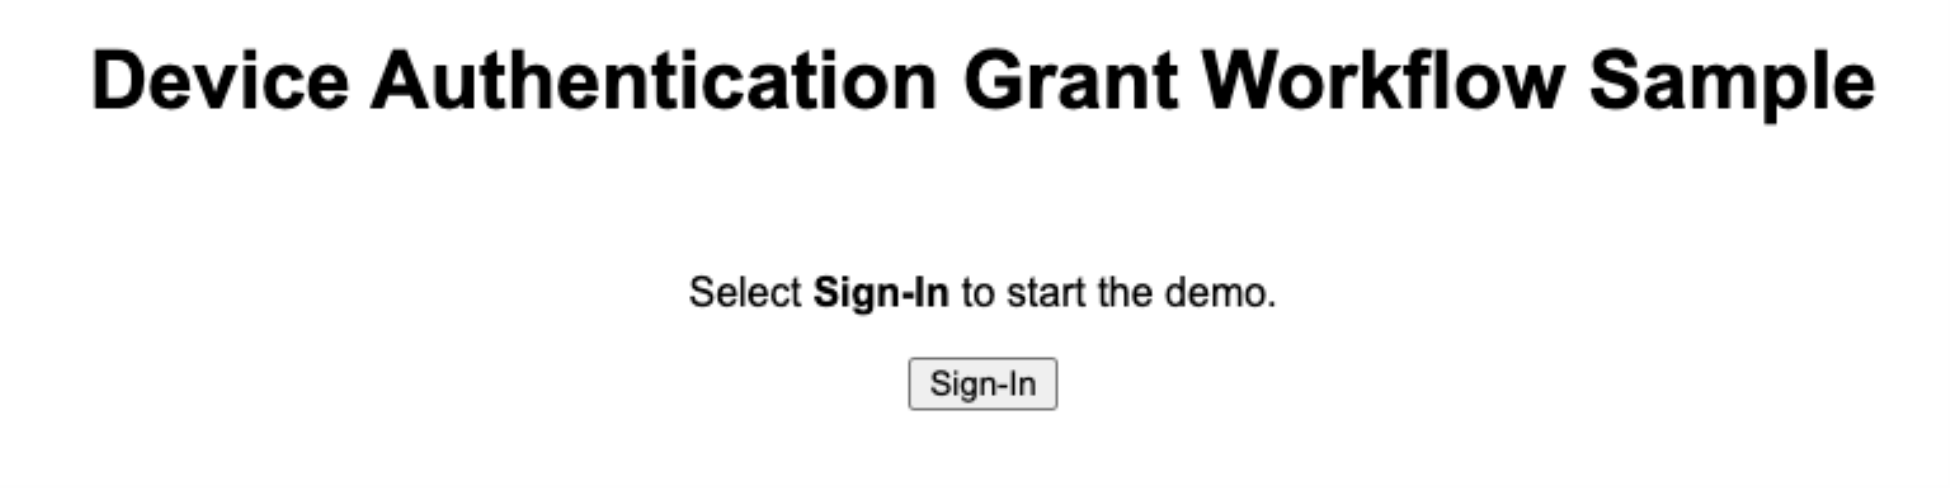
Running on http://10.26.164.77:10060 - Click Sign-In:
- You can scan the QR with any external device or if you are running this sample from a desktop. You can navigate to the verify URL in a separate tab and enter the authentication code.
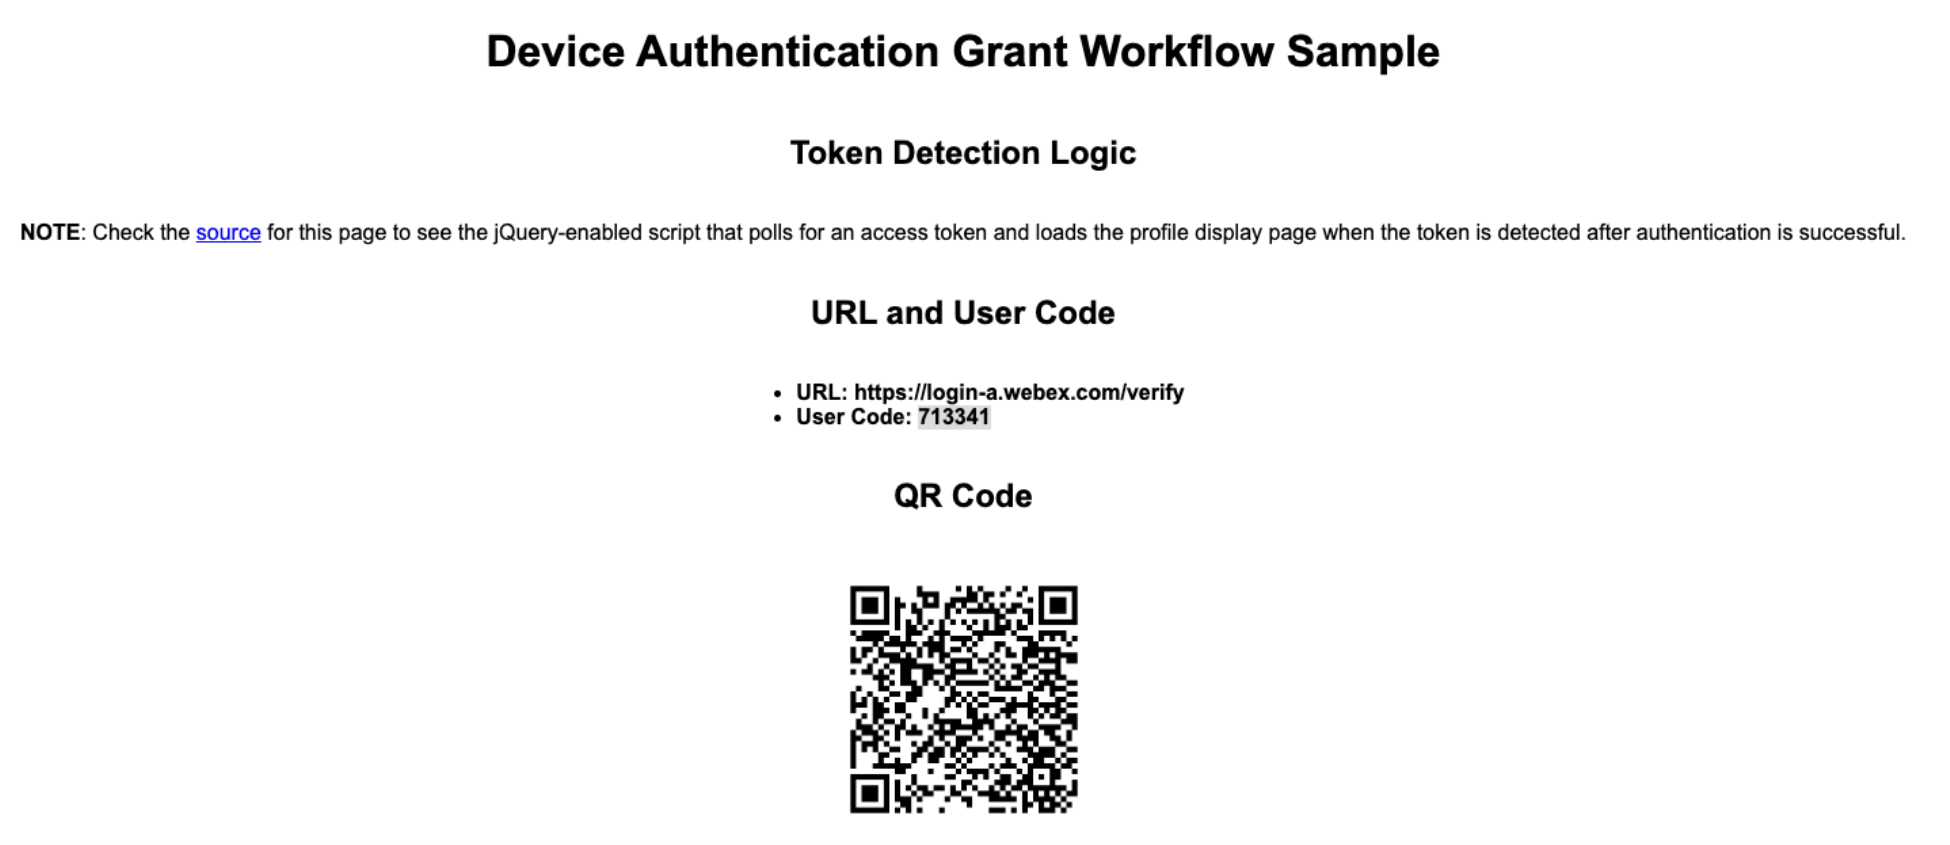
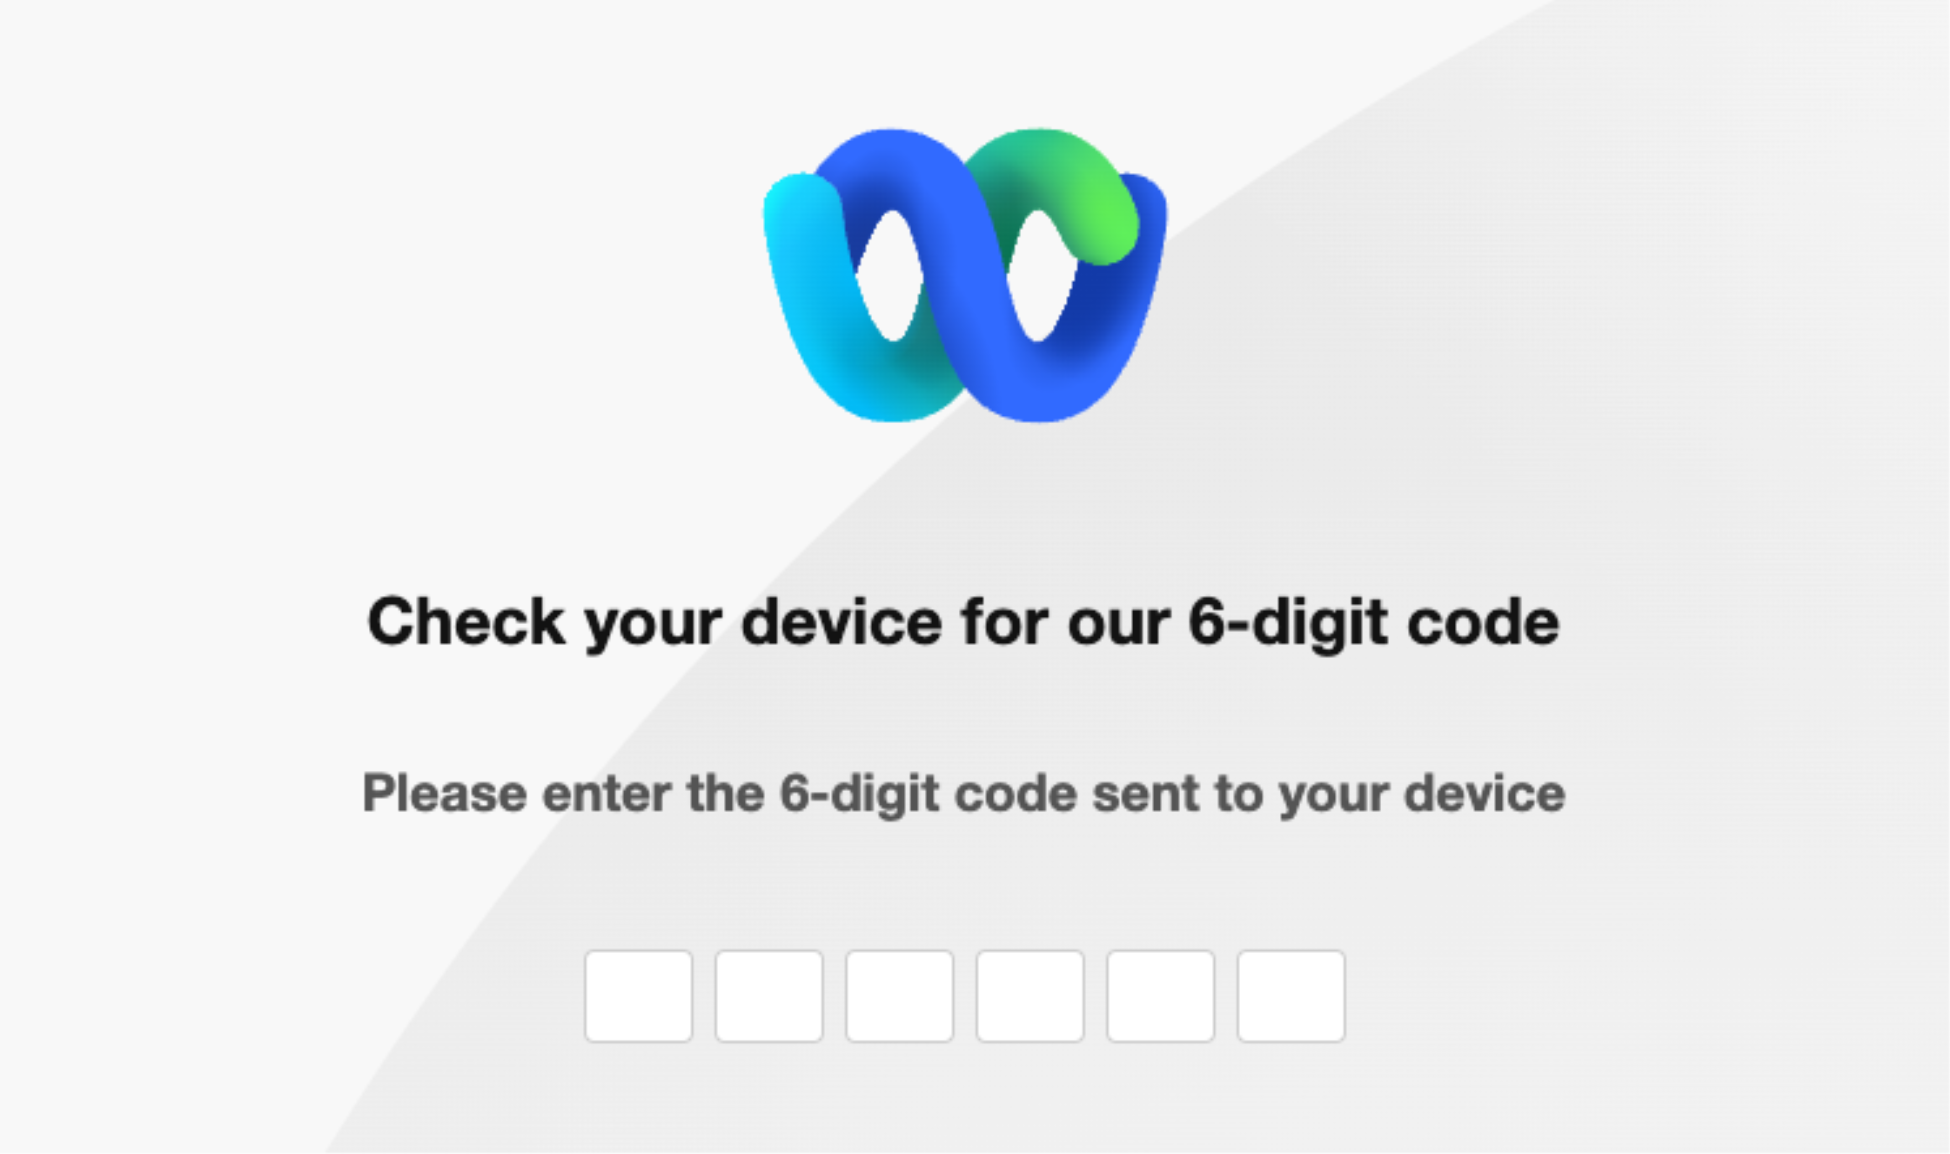
- Once you navigate to the verify URL. You will be presented with the below page. In which you will enter the User Code from the prior page:
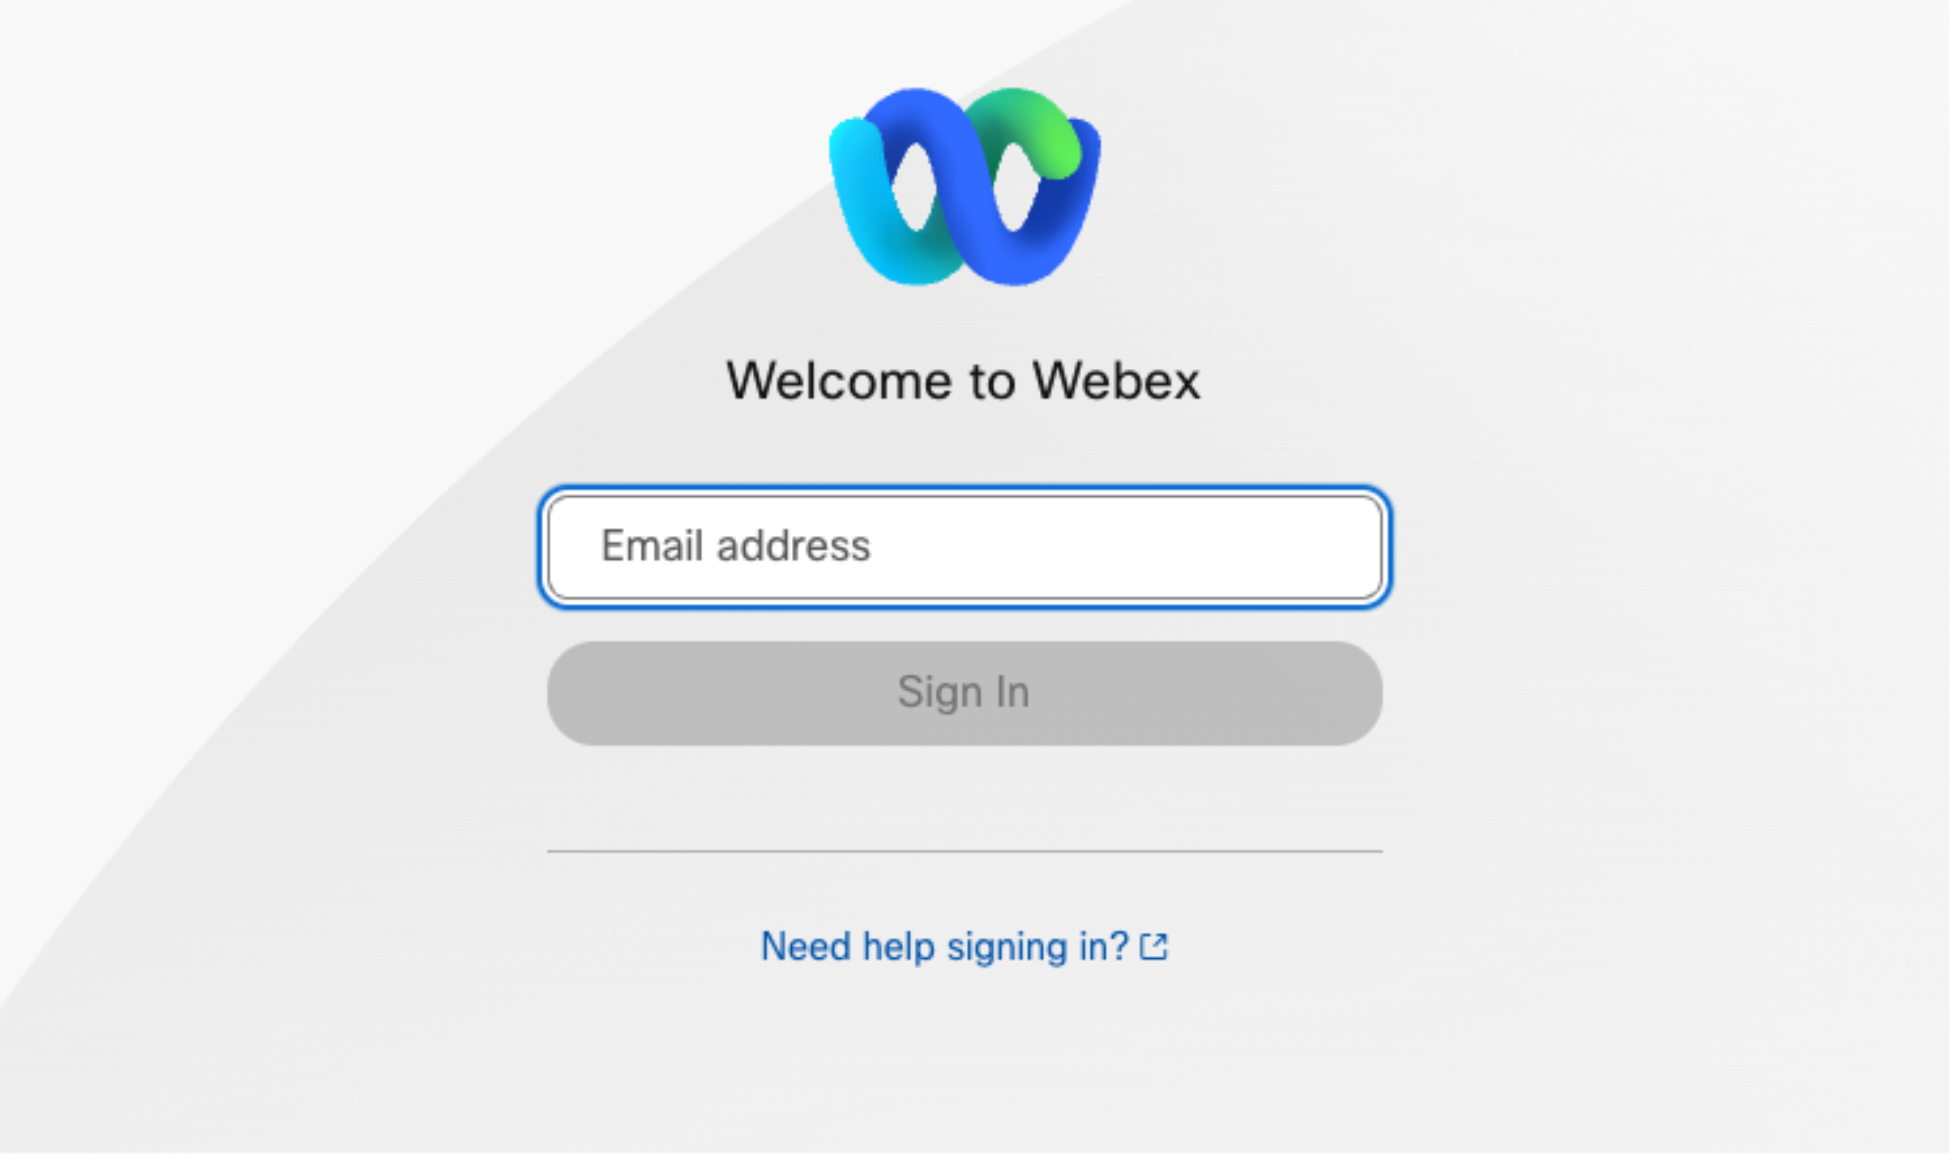
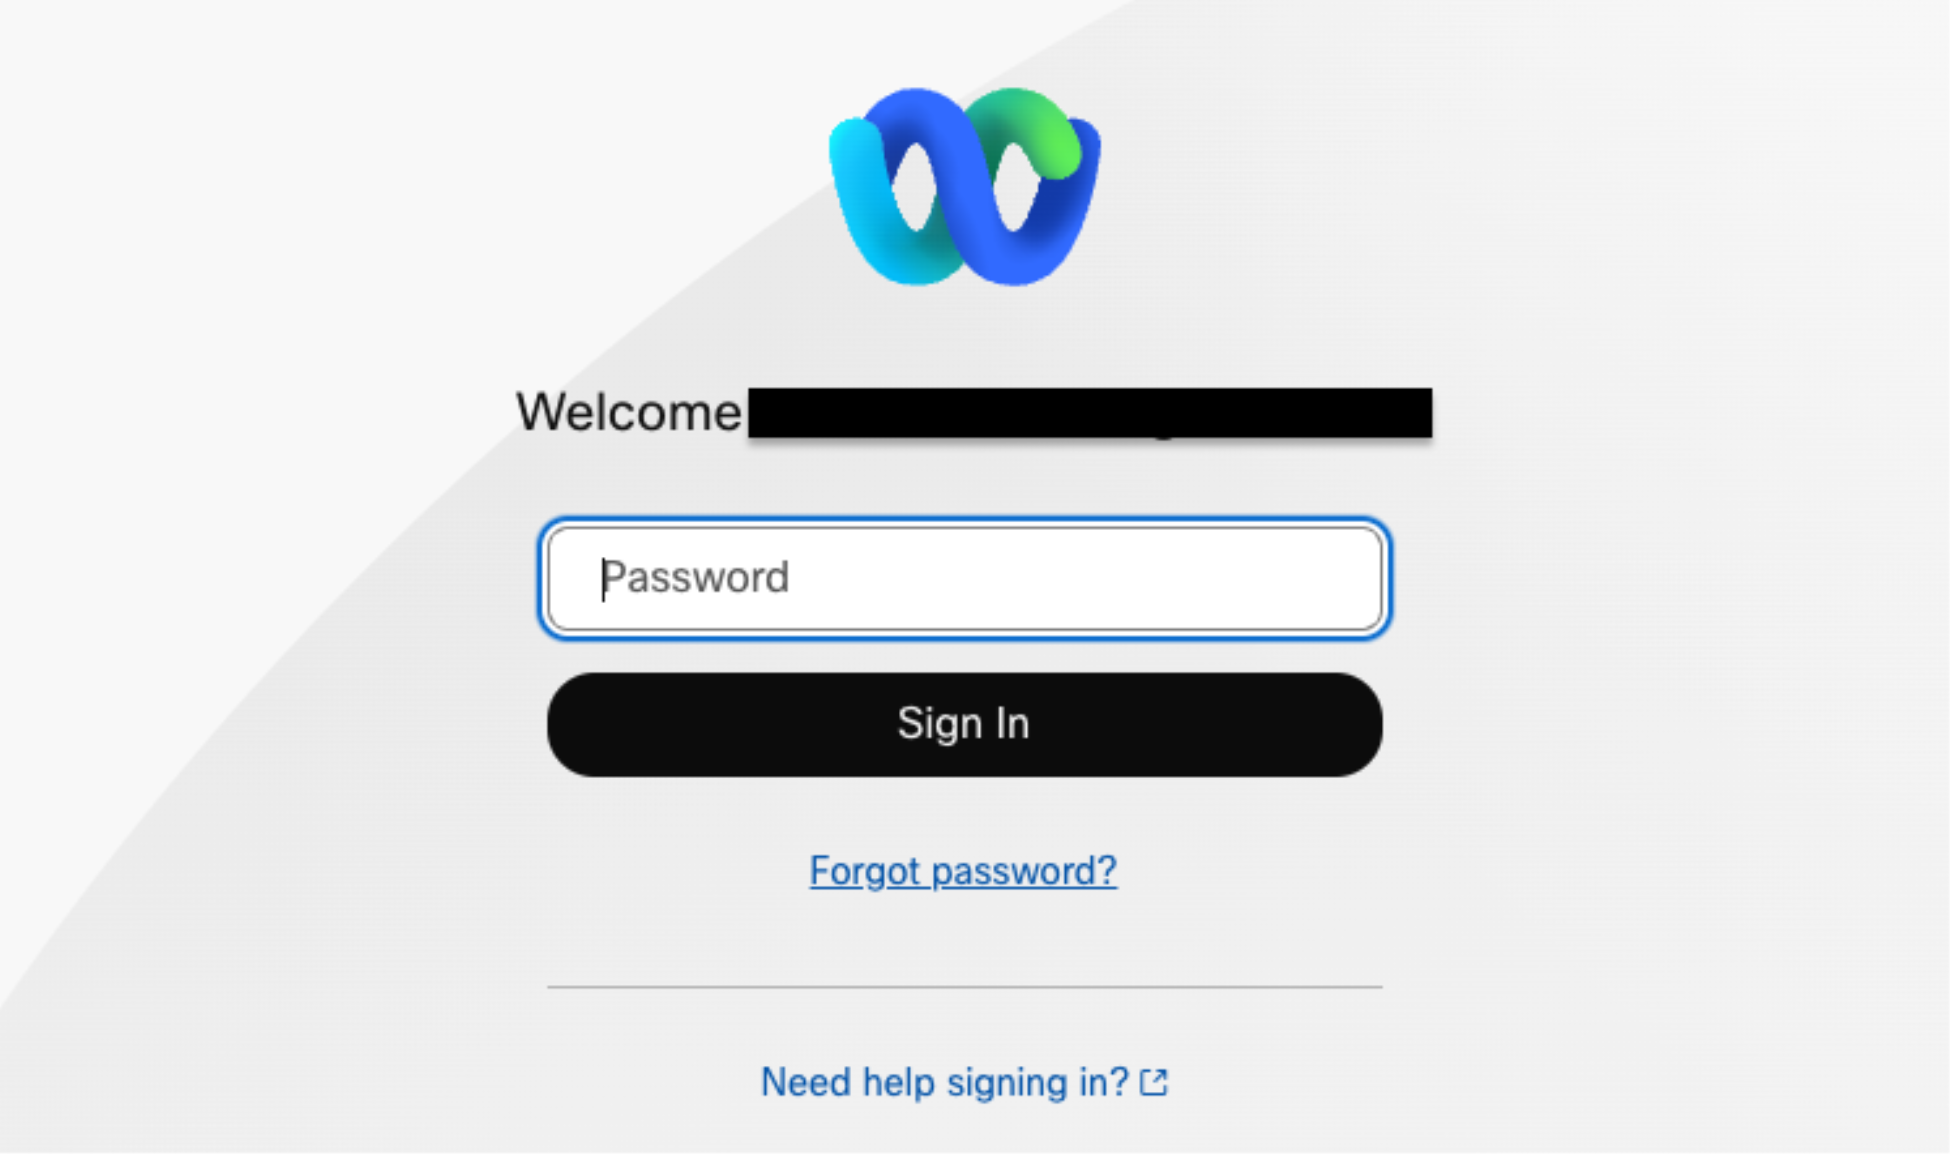
- Once the user code is verified, you will be asked to enter your Webex credentials. These credentials are for the user in which is going to authorize your integration:
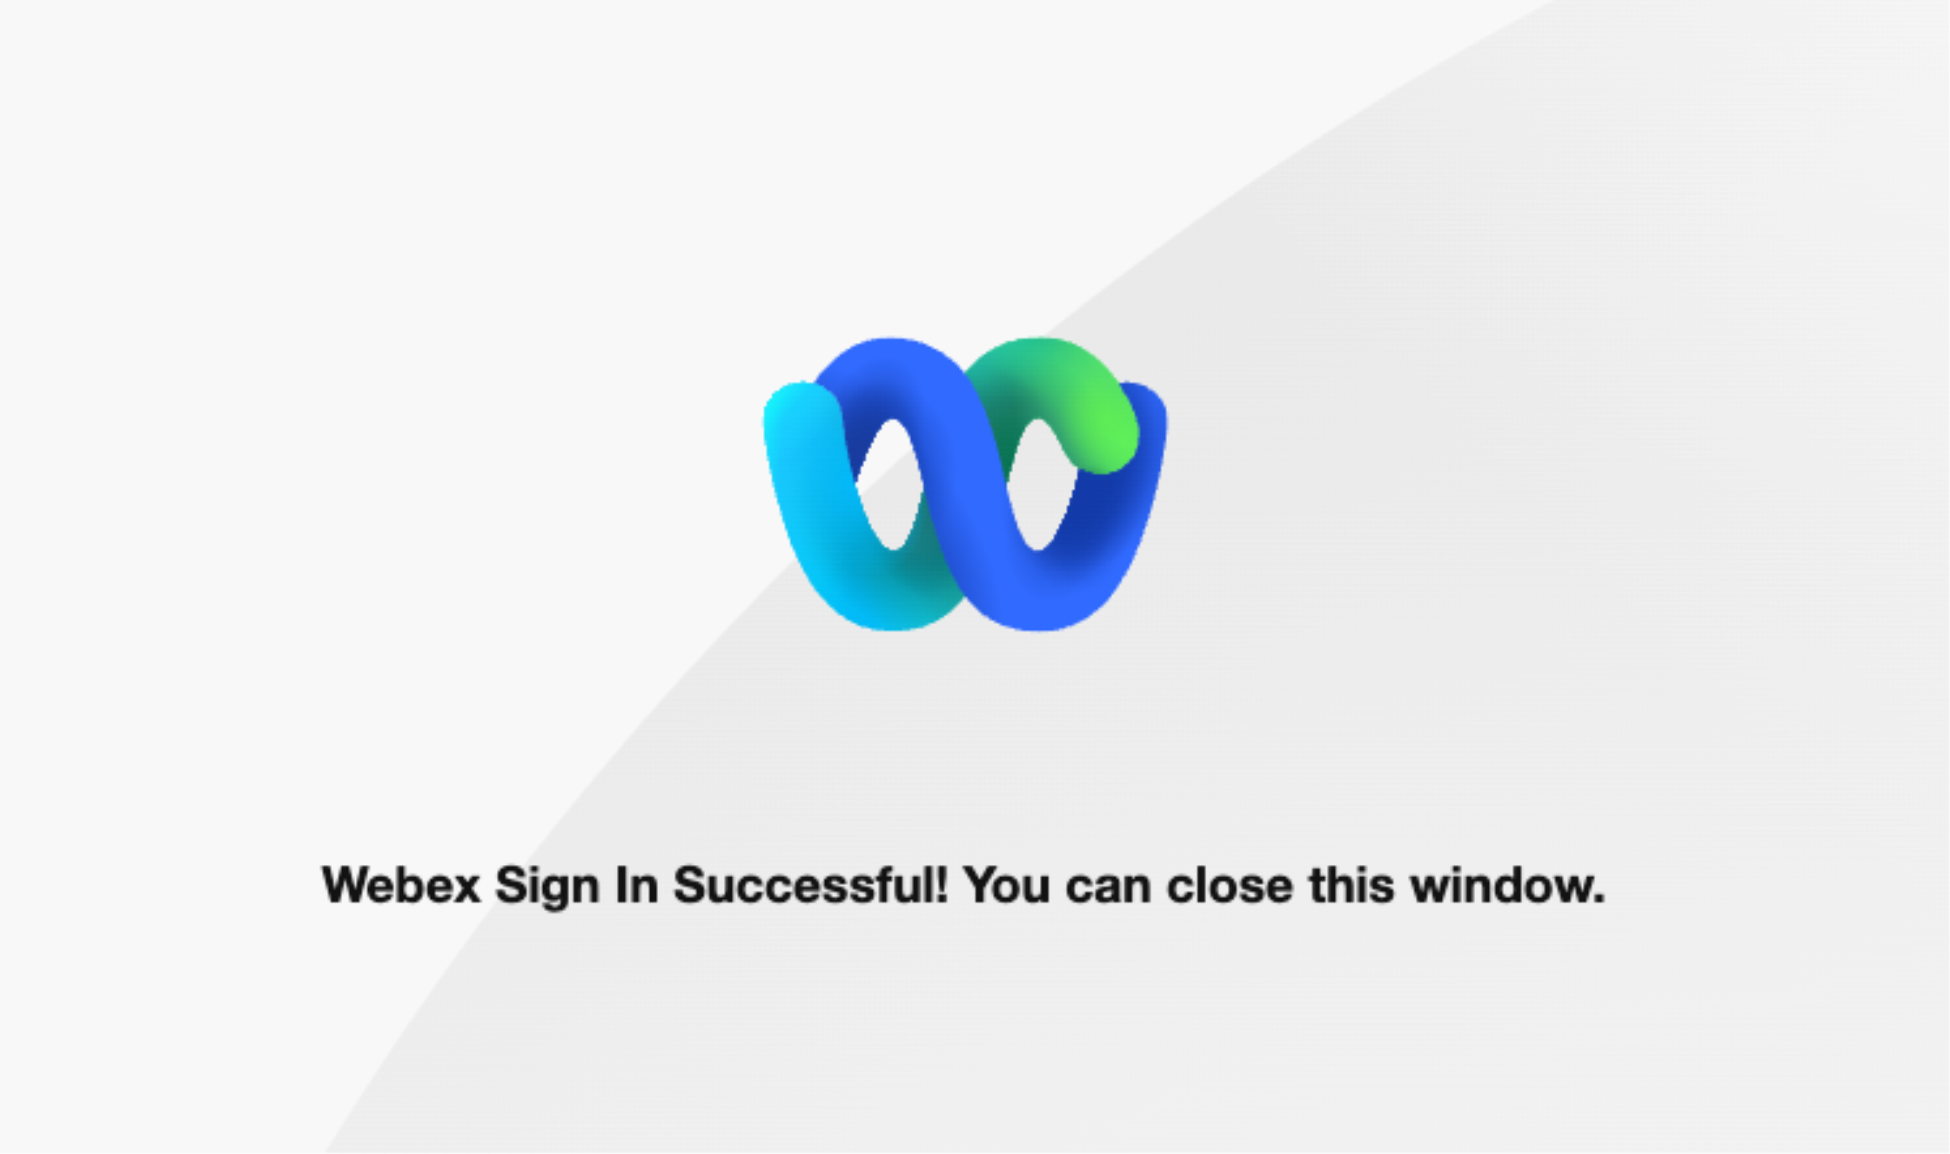
- Once authorization is successful. The Token Detection Logic page will automatically redirect to the below Profile page. This redirection is a confirmation that the user authorization was successful, and that a token was obtained on that user's behalf:
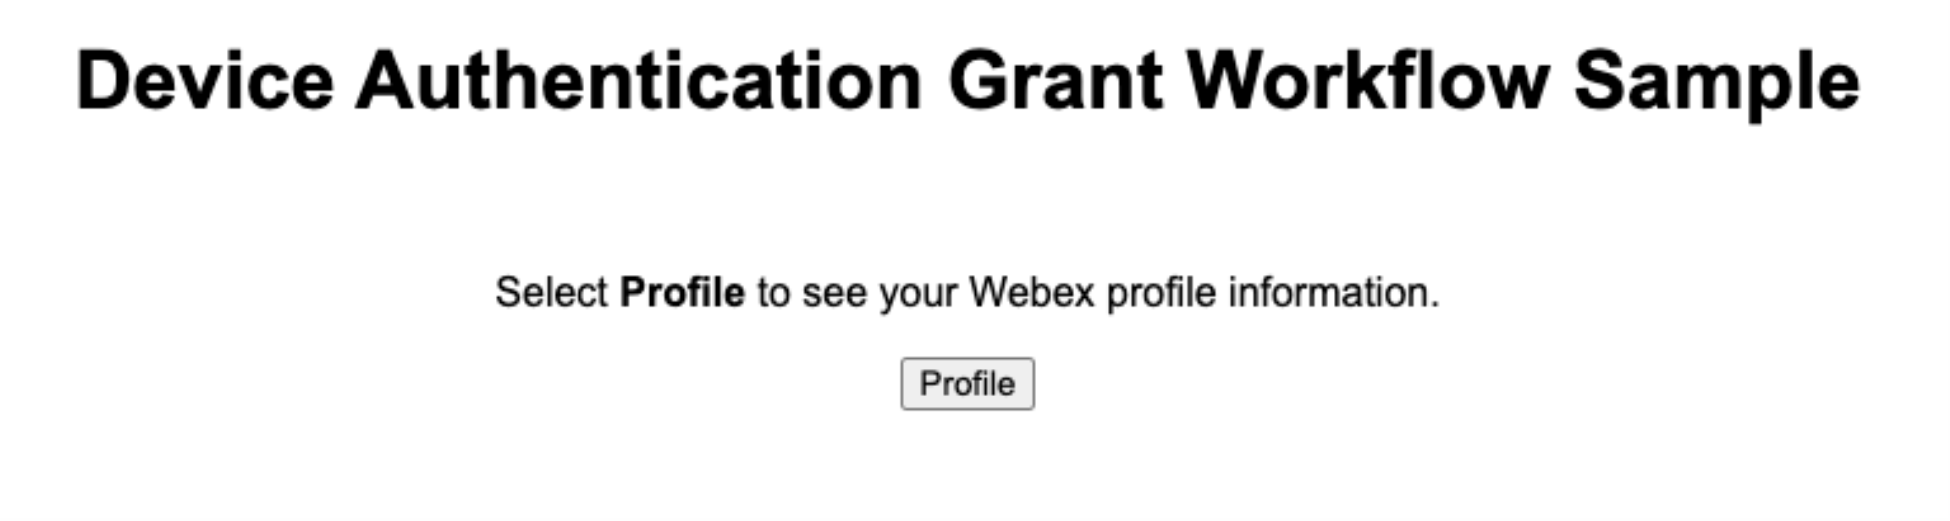
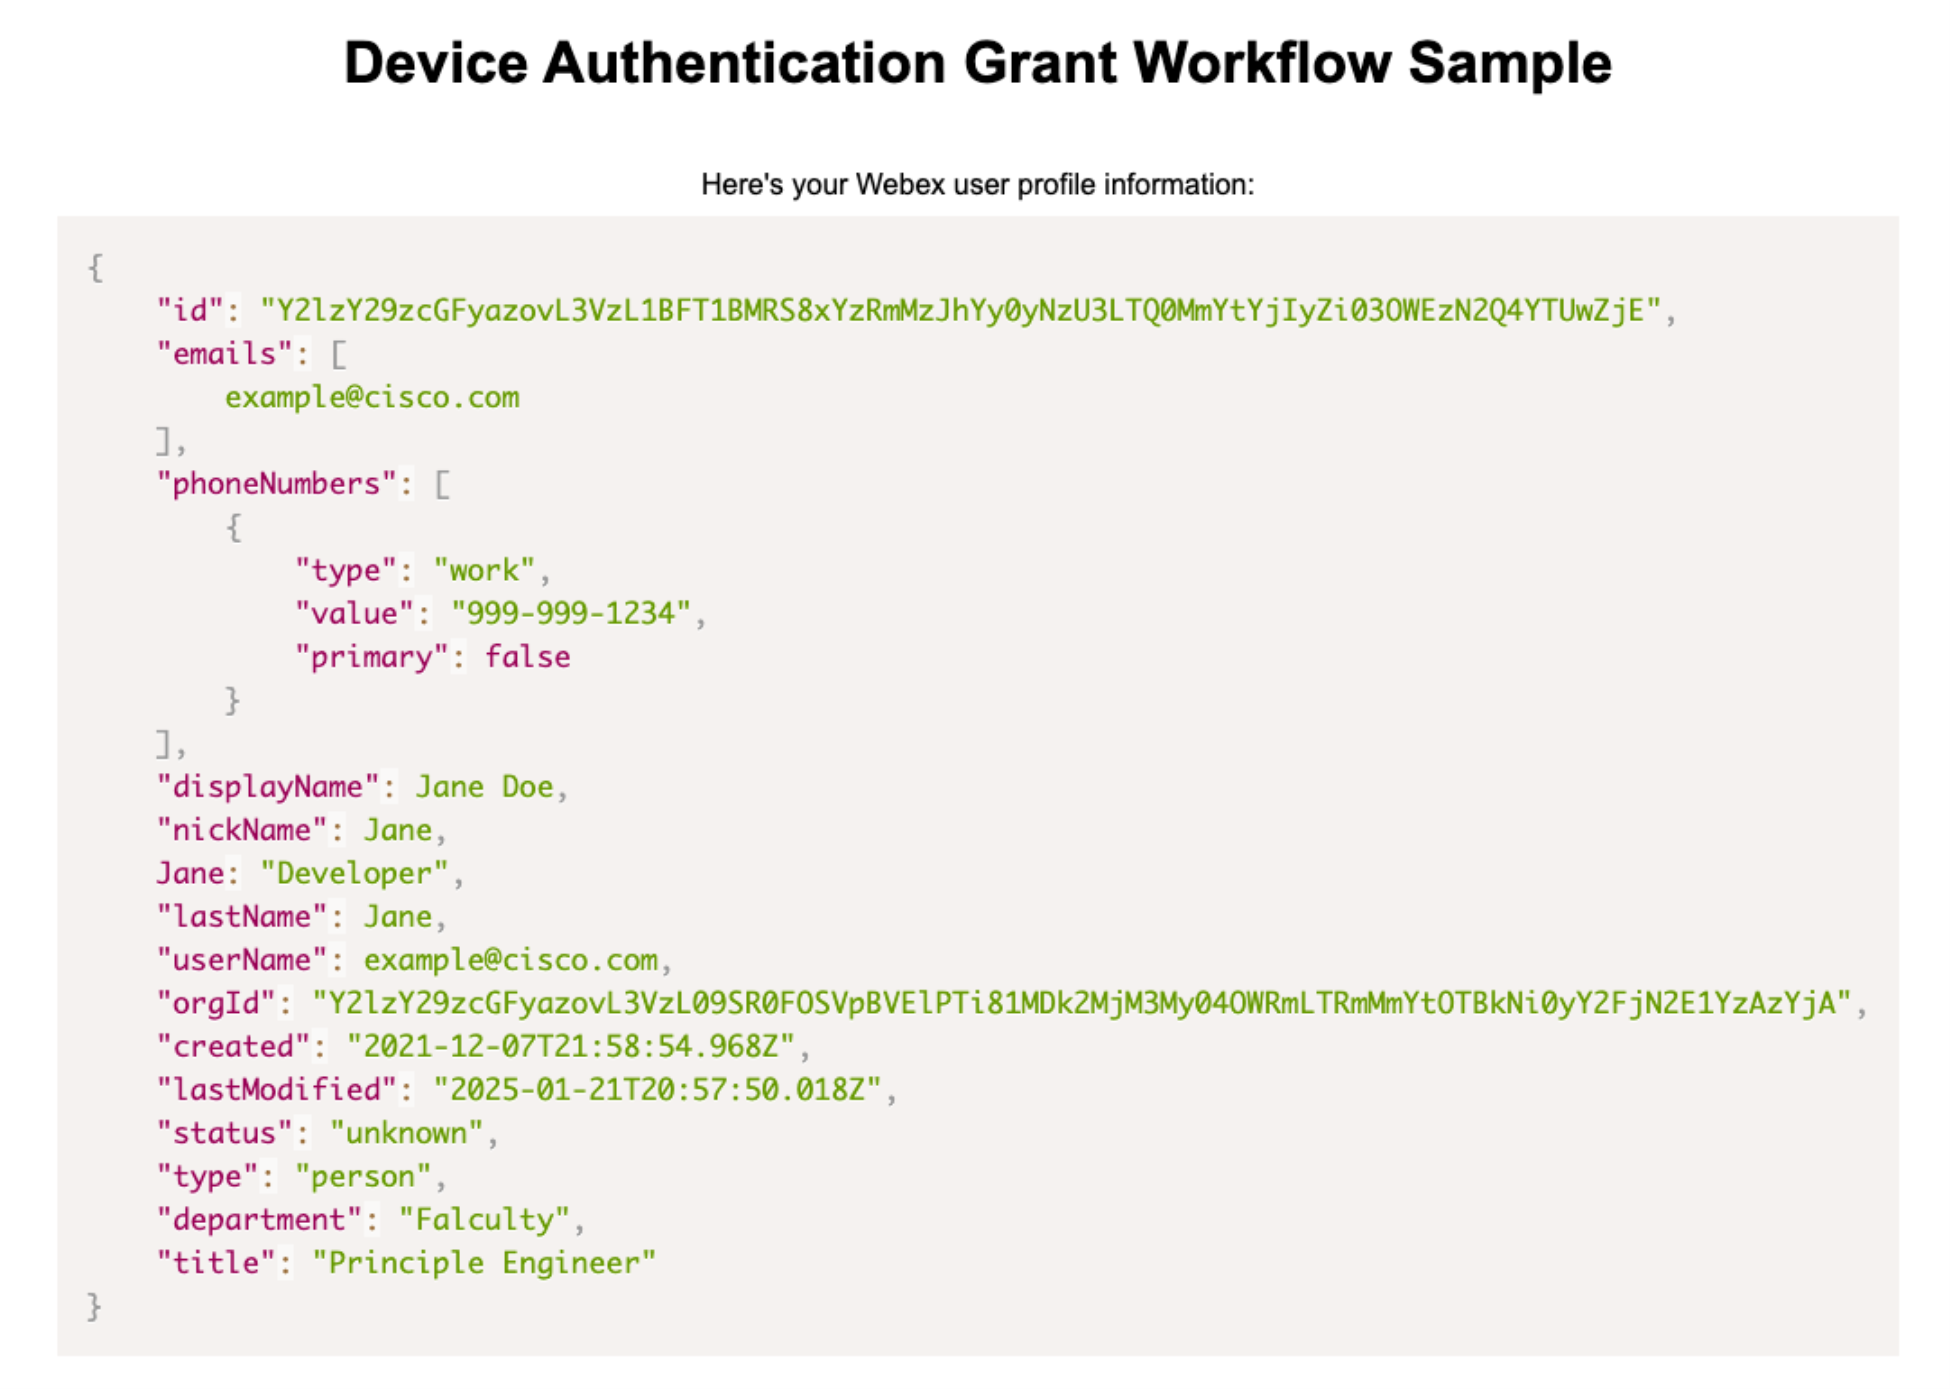
- When you click on the Profile button. The page will use the obtained access token to send an API request to: https://webexapis.com/v1/people/me to retrieve the authorized users details. See the below example:
I hope that you found this blog insightful, and have thoroughly enjoyed learning about the Device Grant Flow. And will dive deeper into the code sample for your personal/corporate use case.
Need Some Help? We Got You Covered!
We are excited to provide you with support for these features. If you need help, the Webex Developer Support Team is standing by and happy to assist. You can also start or join a conversation on the Webex for Developers Community Forum.